
Need help with Android TV Box setup?
One of the great things about cable TV is that it comes ready to go. When you cut the cord and decide to switch to an Android TV box, you are on your own in terms of getting set up. That is why you need my easy Android TV setup guide.
While every Android TV box is different and will have slightly different hardware and setup instructions, if your new TV box runs off the Android operating system there are a few simple principles for setting it up. I will go through all of these in the article below.
I’ll take you through plugging it in, getting online, setting up an account, and downloading essential apps including antivirus, a VPN, and the best streaming apps.
These instructions should tell you everything you need to know, from setting up your remote to watching your favorite shows, whether you are using an OTT TV box, MXQ box, or anything else running the Android operating system.
NVIDIA Shield TV
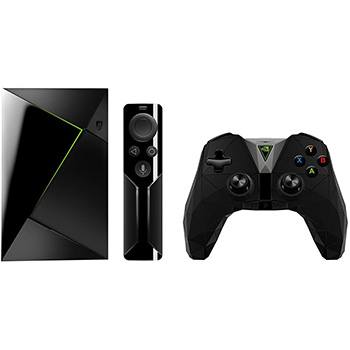
If you are looking for an Android TV box, our best choice is NVIDIA Shield TV. You can find our list of the best available options here.
Consider this your Android TV Box manual. 🙂
Step 1: How To Hook It Up
This is the fun part; ripping open the box and hooking everything up.
Really, I love this part. This is where you’re still excited about cutting the cord and getting a new toy.
Let’s briefly go over how to hook up your new Android box or streaming device.
It’s only two connections really – three in some cases.
The first connector is the HDMI cable. There’s usually one in the box; if not, you can find one on Amazon.
Our 3 Best HDMI Cables
Belkin Ultra HD High-Speed HDMI Cable
Amazon Basics High-Speed 4K HDMI Cable
Amazon Basics Flexible and Durable Premium HDMI Cable
Find an Amazon Basics cable for whatever length you need and you’re done. You shouldn’t pay more than $1 per foot for the cable. If you have a lot of corners that you have to squeeze around or an angry cat that likes to chew wires, then and only then would it be necessary to opt for a braided cable. Otherwise, cheap is good.
Just connect the box to your TV by plugging the HDMI cable into both the box and the HDMI port on your TV. Streaming devices will rarely work on older TVs that don’t have this port.
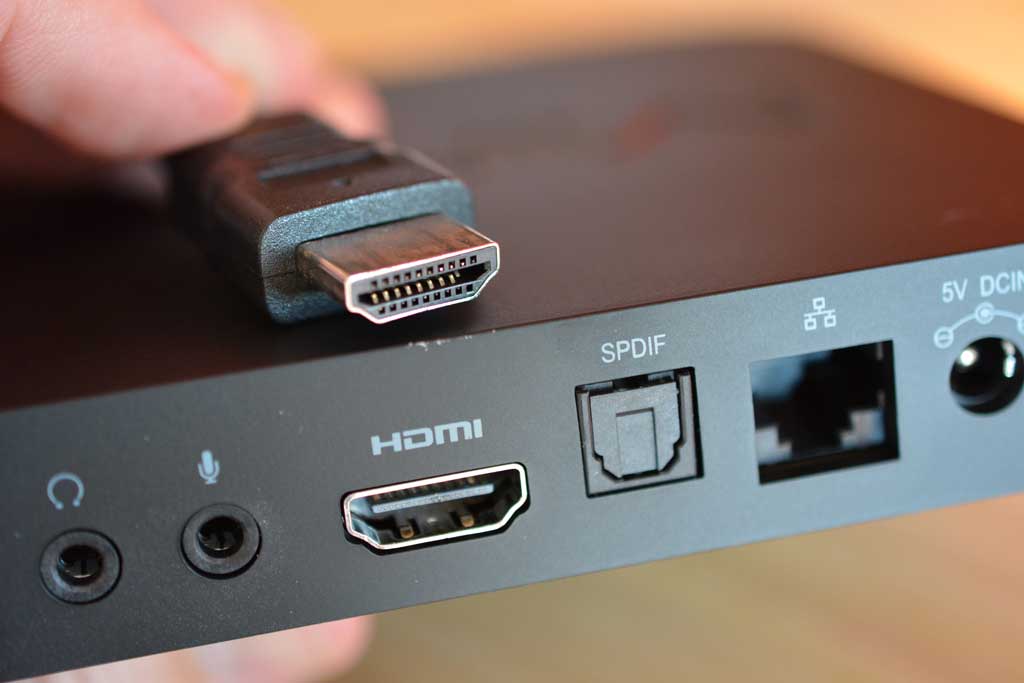
The second connector is the Ethernet cable. This one is optional. You can go wireless and be OK. Ethernet is faster, though, and if you’re going to be streaming 4K you need all the speed (bandwidth) you can get. If you have the option, use wired Ethernet. If you don’t, you can still go wireless.
Personally, I like to get flat ribbon Ethernet cables. They take up less space, you can hide them easier, and there’s no difference in performance. As long as you go with at least Cat 5e, then you’ve essentially future-proofed your wiring.
InstallerParts Ethernet Cable CAT6 Cable Flat 20 FT
Cat 6 Ethernet Cable Black 10ft (2 Pack)
Cat 7 Ethernet Cable, DanYee Nylon Braided
The final connection is the easy one – power. Find an outlet and plug it in. Just don’t overload your power strip and set the house on fire.
Step 2: Synchronize Your Remote
Before you can do much else from here, you are going to need to sync your remote control with your box. The following steps will require entering data and making selections, for all of which you will need a remote.
These days, most TV boxes come with remote control as standard; although sometimes they are very basic and you might prefer to upgrade to a more sophisticated remote you can link to your TV box via Bluetooth.
The first onscreen instructions you see, when you start up your box, will probably relate to syncing your remote. If you need to plug anything extra into one of your USB slots, these instructions will appear.
Most likely, you’ll be asked to press certain buttons on your remote to allow your TV box to sense it and sync up with it automatically.
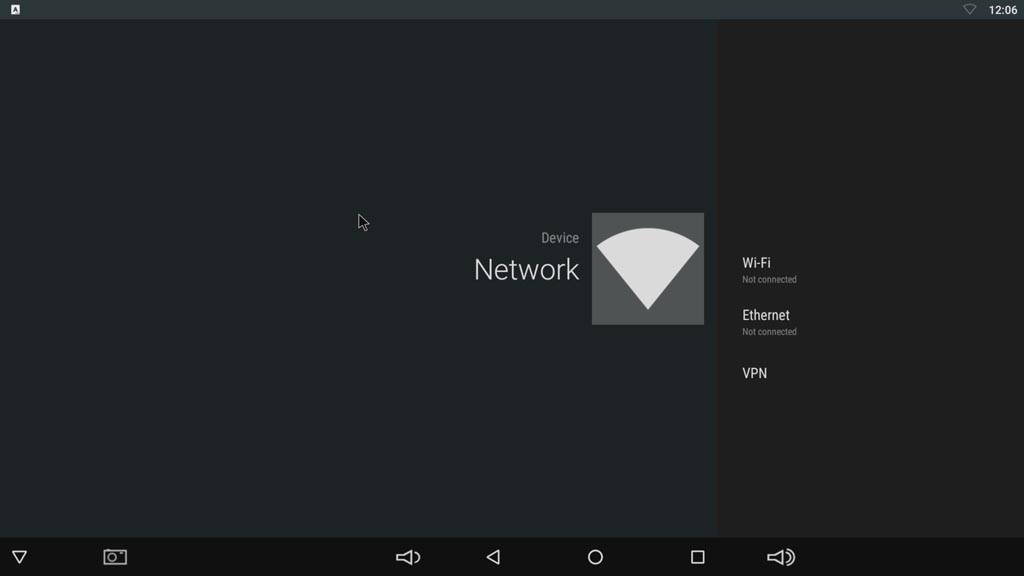
Step 3: Choose Your Network
Before you can do anything else, you need to connect to the Internet.
Some manufacturers have you choose how you’ll connect the device before you even get to the home screen. I think that’s the way to go and that more manufacturers should do it that way since it makes the process quick and easy and doesn’t allow you to forget that step.
If yours doesn’t, you’re going to need to do it manually.
Head over to the Settings screen and click on Network. From there, you’ll be able to enable Ethernet or Wi-Fi and select your network.
Step 4: Add Your Google Account
Once you’ve hit the power button for the first time, the first thing you should do is enter your Google account.
Why?
This starts the process of updating any pre-installed apps and syncing any data you want to follow you from device to device.
For those of you who are super-protective of your privacy and don’t want any of your data on your Android box, that’s OK too.
You do need a Google account linked, though, so just create a different Google account specifically for this box. You’ll need to do this to download any apps from the Google Play Store and get updates.
Unfortunately, while you used to be able to skip the Google account sync, Android has closed this loophole and you now have to link a Google account to your Android TV box if you want to use it.
Step 5: Install The Aptoide App Store
Aptoide TV is an alternative Android app store that has a ton of different apps to choose from.
Even if you mostly use the Google Play Store, Aptoide gives you access to other apps that Google may not list. For example, if Google and Amazon are fighting (like they normally are), you might only be able to find some Amazon apps on Google, but they will all be on Aptoide.

Either way, it gives you more options to choose from. Options are good, right?
Step 6: Get Any Updates
This is one of the most important steps and it’s one of the most overlooked.
Update. Your. Device.
Seriously.
This goes for every device you own, not just the streaming kind.
Manufacturers put out security and feature updates constantly. If you’re not updating your devices, you’re missing out.
Worse still, you’re putting your system at risk.
I’ll warn you now that getting updates is different for every device. It’s usually found in an app, but it could be buried deep in the settings screen. It just depends on how the manufacturer sets up the device.
Here are some of the more popular places to look for your device update function:
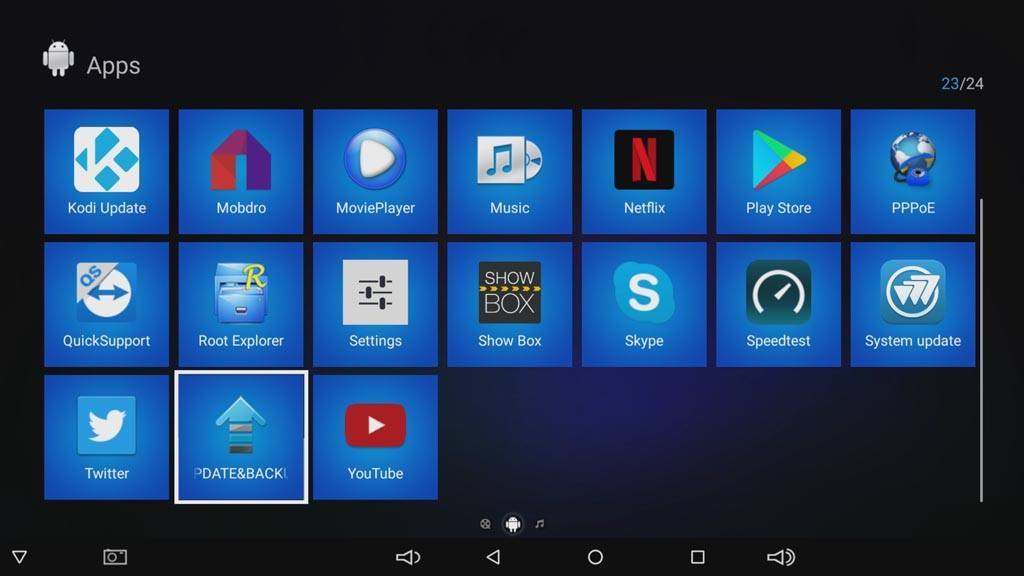
- In the Settings menu under About, there is usually an option for System Upgrade. On the NVIDIA Shield TV, you can also set system upgrades to auto-download when available from this screen.
- In the All Apps tab, you might find apps called something like System Update, Update & Backup, or simply Updater.
Step 7: Google Play Apps
Now that the system updates are done, here comes the fun part.
Let’s get some apps!
You can install apps in both the Google Play Store and the Aptoide TV app store in much the same way.
No matter which one you decide to use, you should double-check that your existing apps have all been updated. Hopefully, we started the process earlier when you entered your Google account information, but let’s double-check.
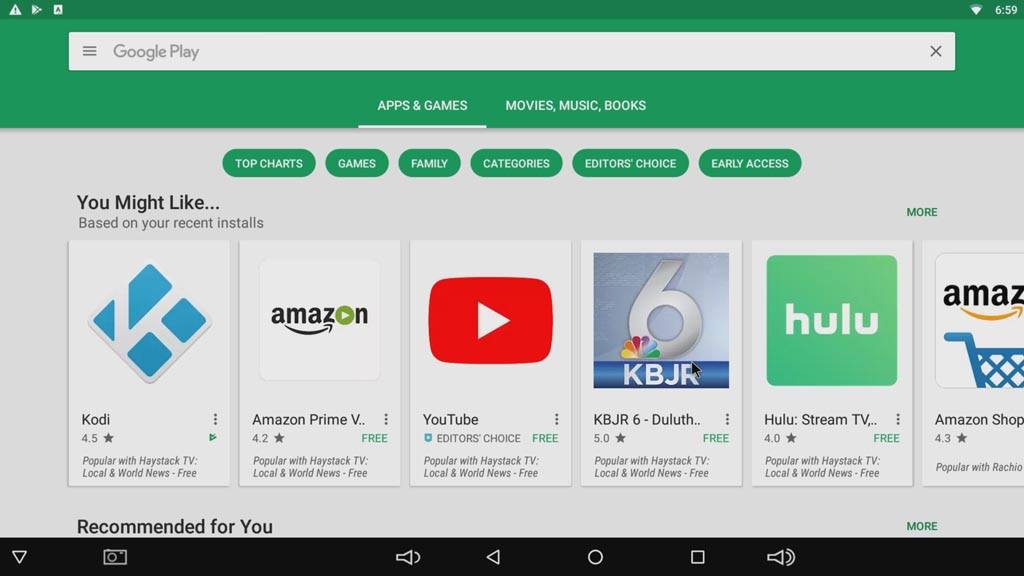
For The Google Play Store
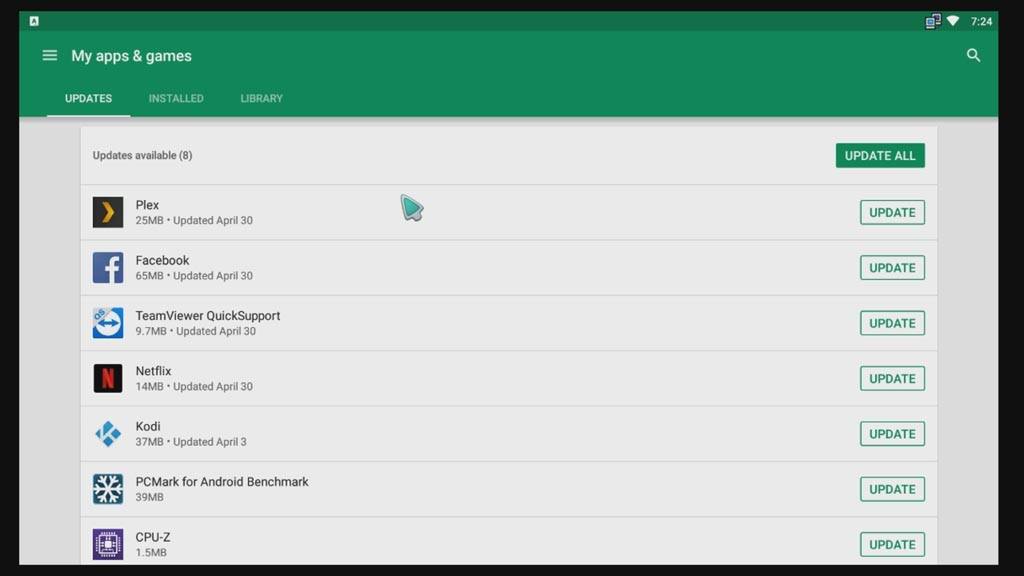
Open the Google Play Store and click on the three horizontal bars or your account icon (depending on your version) in the upper right-hand corner to open the side menu. You’re going to want to click on My Apps & Games or “Manage Apps & Device.”
This pulls up a list of all of your installed apps and will tell you right away if there are any updates available. If so, go ahead and click on Update All. This will probably take a few minutes to download and install everything, depending on how many apps came pre-installed.
Personally, I don’t want to have to do this all the time, so I set the apps to update automatically whenever there’s a new version.
Back on the side menu (click the three horizontal bars again) you’ll see a Settings section near the bottom. Click that.
Under the General tab, you’ll see Auto-Update Apps. Inside you’ll get a couple of different options to turn auto-update off completely, only update via Wi-Fi, or update at any time. I enable auto-update apps at any time. Now you never have to worry about whether you’ve got the latest version of an app or not.
For The Aptoide TV App Store
If using Aptoide TV is more your thing it’s still easy to keep things updated. Aptoide TV has a cool feature that lets you see how many updates are available as soon as you open the app.
On the side menu, scroll down to My Apps and you may see a little red circle with a number in it. In my case, it says ‘5+’. That means I’ve been slacking and I have more than five apps that need to be updated.
A quick swipe to the right and I can see exactly which apps they are and also have the option to update them all at the same time.
What About Other Apps?
Of course, it is also conceivable that you might want to download and install applications that aren’t available in either the Google Play Store or the Aptoide Store. We aren’t just talking about dodgy apps, either; for example, the Google Chrome app isn’t available in the Google Play Store.
If you want to set yourself up to download APKs from wherever you want, you need to make a few changes to your box.
The first change is to enable developer options. To do this, go to Settings, and in the Device row, select About. You will need to select this several times. After you have clicked 5-7 times a dialogue box will open letting you know that developer options have been enabled.
Now you will have the power to enable your Android TV box to download and install apps from other sources. You will find this option in the security menu. There should be a menu item that refers to unknown sources, and you just need to ensure that the toggle is set to allow.
After this, you will want an application that allows you to easily download and install APKs from other sources. While there are several out there, my favorite and probably the most popular is Downloader. It is super easy to install because it is available in the Google Play Store.
Once you have installed this, you can use the search function within the Downloader app to navigate to internet pages that have the APKs that you want. You can download them directly onto your box and install them using the Downloader app, with no USB drives or other fancy transfers required.
Remember to delete installation files once the installation is done; the Downloader will prompt you to do this. You don’t need them anymore and they just eat up space on your device.
Always research apps from unknown sources before installing them. While apps in the Google Play Store have been vetted for security, the same is not true of APKs that you download off the net. A quick Google search should show any red flags, and the online community tends to be very vocal about problem apps.
Read our complete guide to installing Downloader and sideloading apps onto your Android TV box.
Step 8: Setup Antivirus Software
You wouldn’t browse the web on your computer without the protection of anti-virus software and you shouldn’t do it on your Android TV box either. Anything you download could contain malware that could leave your box sluggish and compromise your personal data.
Also, don’t forget that your TV box can be a gateway to the rest of your network since it is connected to your internet. Don’t take the risk.
You can probably protect your Android TV box with whatever antivirus service you are using to protect your PC. Most antivirus services let you cover several devices with a single account, so it is just a matter of downloading the app for your preferred antivirus service (and all the good services have apps for Android) and signing into your account to activate protection.
Don’t have antivirus protection? Find our recommendations for the best antivirus services for Android TV here.
Step 9: Set Up A VPN
If you want to keep your streaming private…
If you want to get access to content anywhere in the world…
This kind of security feature is not something you should play around with anymore, especially if you’re streaming from a source that you’d prefer authorities not to know about.
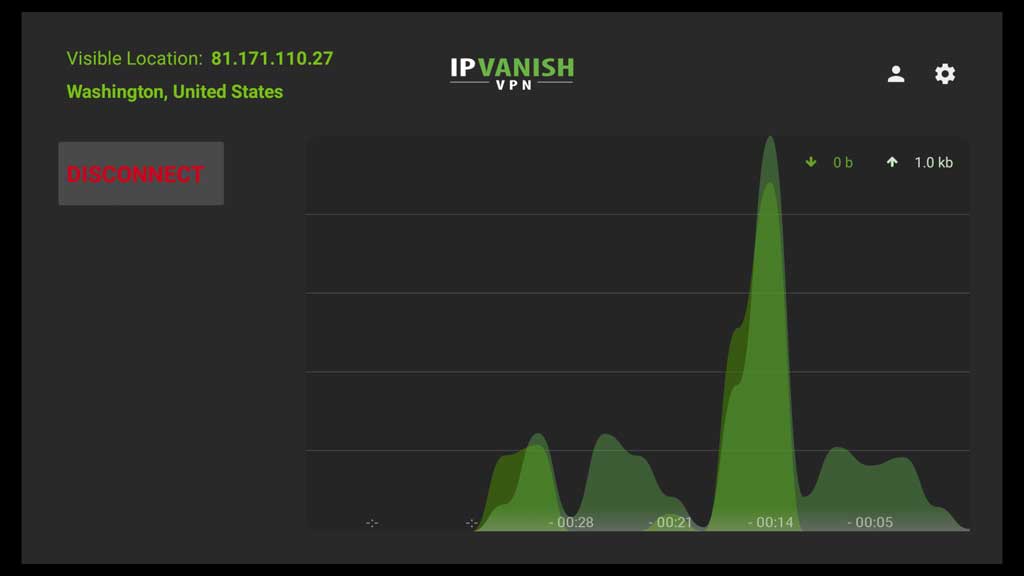
There are a lot of different options if you’re looking for a VPN for streaming. Personally, I use IPVanish.
No VPN is perfect, and I’ll argue with anyone who tries to tell you differently.
What I like about IPVanish is that it lets me (in the US) stream content from other countries (like Canada) and lets my fiancée who is overseas stream content from the US.
This is what I believe: No company should limit what I can watch just because of where I live.
A VPN lets me get around their limitations. For me, that’s well worth a couple of dollars a month.
Sign up for IPVanish and get access to content around the world.
Step 10: Start Streaming
Now that all of that is done, you are ready for the best part: streaming your favorite content!
Using your TV box is going to be a lot like using your smartphone. Just use the remote to navigate to the content you are interested in, enter the app, and follow the intuitively designed steps to get watching.
The process will be a bit different depending on whether you are using an on-demand streaming service such as Netflix, a live TV application such as Sling TV, or something that draws on your own media library such as Plex.
Whatever you are doing, these apps are specifically designed for streaming content so it shouldn’t be too challenging to figure out from this point.
Next Steps
So where do you go from here?
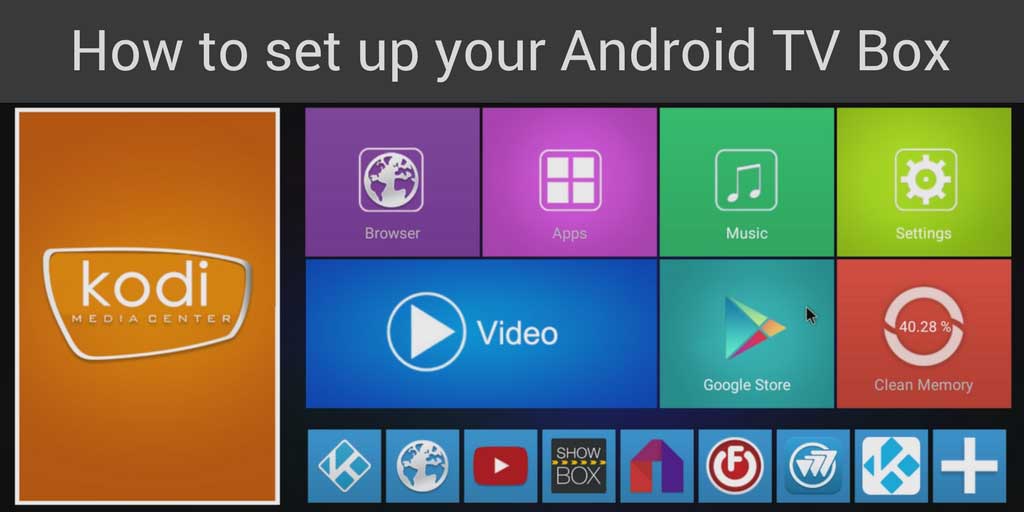
I deliberately didn’t mention anything about Kodi or Plex in this article. That’s a whole other setup guide.
Here are a couple of suggestions for what to do next:
- How to setup Kodi…the right way (including installing add-ons)
- Kodi VPN crash course: Do I need a VPN for Kodi?
- Cord-cutting guide: What’s the best streaming service?
- How to do 4K streaming the right way
Kodi, with the right add-ons, can significantly improve your streaming experience by allowing you to search and access all of your streaming content in one place, so I do recommend checking out these guides, but you certainly don’t need Kodi to start watching today.
FAQs
How do I get channels on my Android TV box?
The whole point of streaming devices is that instead of providing only a pre-selection of channels and showtimes as you get with a cable or satellite subscription, you seek out and select what you actually want. For most people, this means on-demand services such as Netflix but also live TV channels.
There are a variety of apps that let you stream live TV. Often the individual channels have their own apps, and you can also get bundles of channels through services such as Hulu and Sling TV. While some are free, many premium channels, such as HBO, have subscription services.
Find our recommendations for the best streaming apps here.
Can you use an Android TV box without a SmartTV?
Absolutely, you can use an Android TV box without a smart TV. They are designed to “smartify” older TVs, and if you have a smart TV you might not need an Android TV box as your TV already has much the same functionality. As long as your TV has an HDMI port connection and you have internet service, it should work with an Android TV box.
How do I connect my TV box to Wi-Fi?
When you first use your Android TV box it will take you through setup options. After you set up your remote, it will either take you automatically to your network connection or you can manually find that section of your box’s settings. Here you can choose an Ethernet connection or Wi-Fi.
You connect to your Wi-Fi just like you would on any other device. Choose your network and enter the password.
If you have already set up your box and need to re-connect to your Wi-Fi network, you will find the option to do this in your settings menu, usually under connections.


How can i reprogram my keyboArd remotE or can i use a universal remote?
Just want to say your article is as astonishing. The clarity for your publish is simply great and that i could assume you are knowledgeable on this subject. Fine along with your permission allow me to seize your feed to stay up to date with coming near near post. Thank you 1,000,000 and please keep up the rewarding work.|
I purchased an Android TV Box 12. I do receive Fox Nation on my PC and my cell phone. I connected our Sony TV to WiFi and downloaded Fox Nation through Google Play. Every thing was working well accept when I got to sign in for Fox Nation the cursor with the Android TV Box remote did not go up to email address so I could enter that information. The cursor did get up to password. So I could not sign in. Do you know what I can do to sign in correctly.
I contacted Fox Nation and worked with 5 experts but what I found out that since my TV was not a Smart TV what they suggested did not work.
I appreciate you reaching out with your concern about signing in to Fox Nation on your Android TV Box. It seems like you’ve encountered a common issue, and I’m here to help you resolve it.
Firstly, it’s essential to ensure that the Android TV Box remote is functioning correctly. If the cursor is not responding as expected, you may want to check the batteries, connectivity, or try re-pairing the remote with the TV Box.
Assuming the remote is working fine but you’re still unable to navigate to the email address field during sign-in, here are a few troubleshooting steps:
Tab Key on Remote: Some Android TV Box remotes have a “tab” or similar key that can help you move between input fields. Check if your remote has such a key and use it to navigate to the email address field.
Update Fox Nation App: Ensure that your Fox Nation app is up to date. Outdated versions may have compatibility issues. Go to Google Play, find Fox Nation, and check for any available updates.
Web Browser Sign-In: If the issue persists, consider using the web browser on your Android TV Box to sign in to Fox Nation. Open the browser, go to the Fox Nation website, and sign in from there.
External Keyboard: If the remote continues to pose challenges, you can connect an external USB keyboard to your Android TV Box. This can provide a more straightforward way to input your email address and password.
OR!!! It can be because of the unSMART TV! ))
I hope one of these solutions helps you successfully sign in to Fox Nation on your Android TV Box. If the problem persists, please provide additional details about your TV Box model, and I’ll do my best to offer more tailored advice.
Hey baybay
Nice to meet you! ))