
You signed up to our AndroidPCReview.com newsletter, right? Now you just need to make sure that our emails won’t end up in your Spam filter.
Follow the steps below to configure your email client to make sure all of our emails get through to you. Special thanks goes to Aweber.com who created this tutorial.
If you haven’t already subscribed, what are you waiting for?
GMail
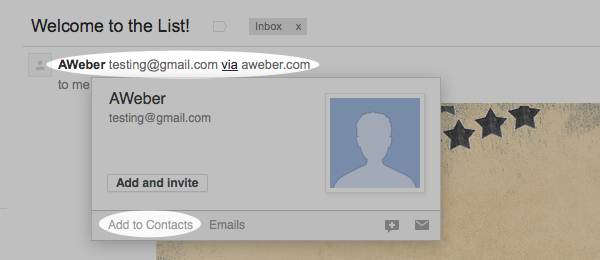
Log into your account and open up the email in your inbox. Hover over the sender’s name and a window will pop up. Select “Add to Contacts” to save the sender to your Contacts list.
You can also whitelist in GMail before opening the email. To do so, hover over the sender’s name next to the subject line in the inbox. Click “More” in the pop-up box. Select “Add to senders” to save to your Contacts list.
Yahoo!
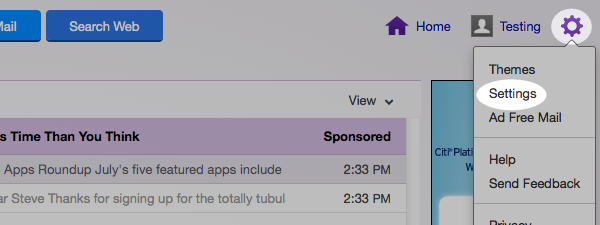
Log into your account, hover over the “Settings” icon and click “Settings”.
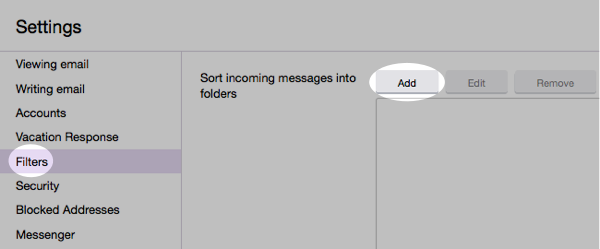
In the “Settings” tab, select “Filters” from the left menu and click the button to “Add” a filter.
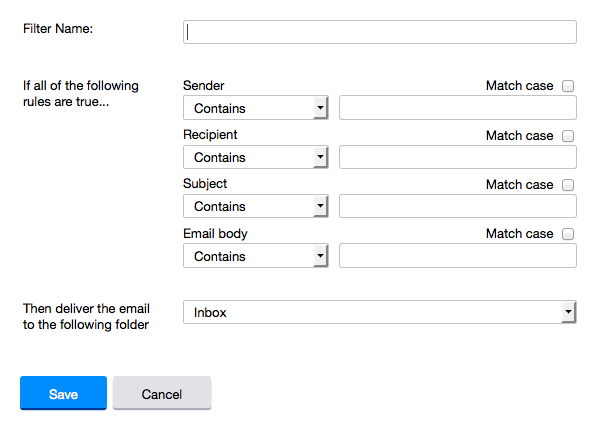
Type a name for your filter in the “Filter name” field. Select “contains” in the “sender” drop-down menu. Type the sender’s email address in the “sender” text field. In the “Move to Folder” drop-down menu, select “Inbox”. Click the “Save” button in the top bar to save the filter.
Hotmail
In the upper right hand corner of your account, click on the “Settings” icon. From here, click on the option for “Options”.
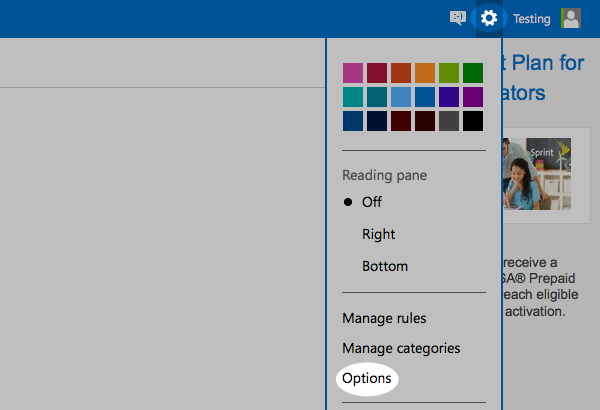
While in this section, click on the option for “Safe and blocked senders”.
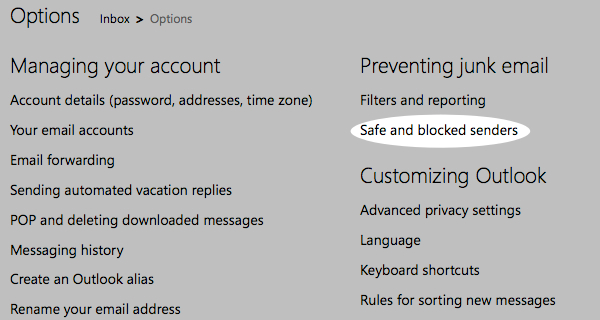
Click on “Safe senders”.
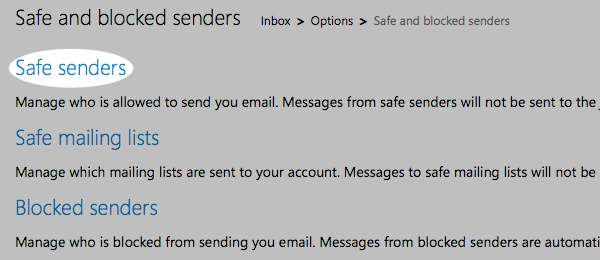
Enter in the sender’s email address and click the button to “Add to list”.

AOL
In the upper right hand corner of your account, click on “Options”. From there, click “Mail Settings”.
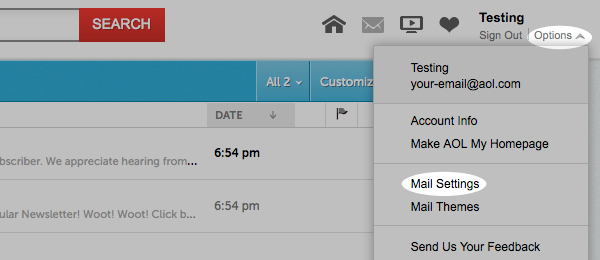
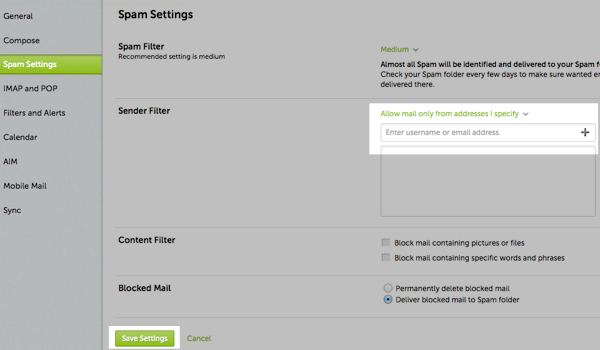
On the “Settings” page, click “Spam Settings”. From there, choose “Allow mail only from addresses I specify” on the drop-down menu. Enter in the sender’s email address, click the plus button, and click save to save your changes.
Outlook 2003 (and higher)
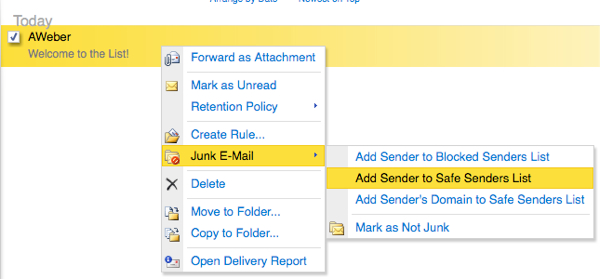
Right-click on the message in your inbox. Select “Junk E-mail” from the menu. Then, click “Add Sender to Safe Senders List”.
MacMail
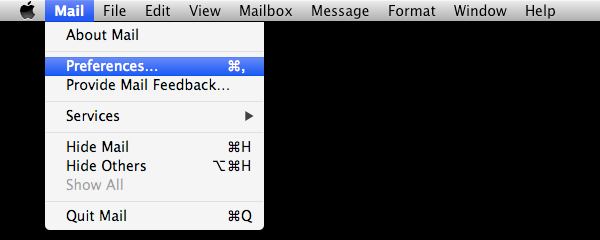
Select “Mail” and “Preferences” from the top menu.
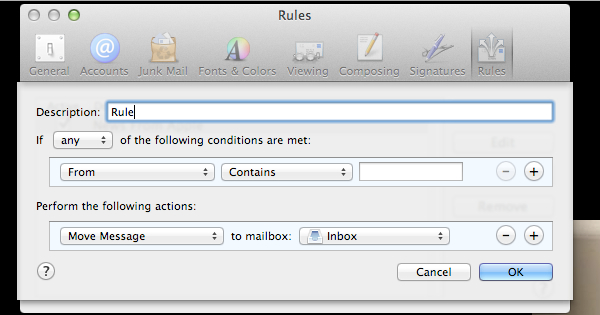
In the “Preferences” window, click the “Rules” icon. Then, click the “Add Rule” button.

In the “Rules” window, type a name for your rule in the “Description” field. Use the following settings: “If any of the following conditions are met: From Contains.” Type the sender’s email address in the text field beside “Contains.” Select “Move Message” and “Inbox” from the drop-down menus. Click “Ok” to save the rule.
Verizon
- Open your email.
- Click “Options”.
- Click “Block Senders”.
- Locate the “Safe List”.
- Enter your contact’s domain.
- Click “OK”.
Comcast
- Click “Address Book”.
- Click “New” and click “New Contact”.
- Add the sender’s email address.
- Click “Save”.
Cox.net
- Open your email.
- Click “Preferences”.
- Under “General Email Preferences”, click “Blocked Senders”.
- Type in the sender’s email address in the “Exceptions List”.
- Click “Add”.
- Click “Save”.
Road Runner
- Click your “Junk Mail” folder.
- Select the email that includes the email address you would like to add as a safe sender.
- Click “Mark as Not Spam”.
AT&T WebMail
- Select “Options”.
- Select “Filters”.
- Click “Add Filter”.
- In the top row labeled From Header, select “contains” from the drop down menu.
- Enter the sender’s email address.
- Move down to the bottom where there is the option “Move the message to”. Select “Inbox” from the drop down menu.
- Select the “Add Filter” button again.
EarthLink
- Click “Add”
- Enter your sender’s domain i.e. example.com.
- Click “Save”.
Thunderbird
- Check if your sender’s email is in your “Junk” folder. Then, right click on the email and select “Mark As Not Junk”.
- Click “Address Book”.
- Make sure that the “Personal Address Book” is highlighted.
- Click “New Card”, the “New Card” window will display.
- Under the “Contact” tab, copy your sender’s “From” address and paste it into the email dialog box.
- Click “Ok”.
Windstream
- Click the “Settings” tab.
- Click “Messages”.
- Click “Allow and Block Messages”.
- Select “Advanced Block Senders”.
- In the “Allowed Senders and Domains” area, type the sender’s email address you want to allow.
- Click “Ok”.
MSN
- Select “Settings”.
- From the email settings screen, select “Junk E-mail Guard”.
- Select “Safe List”.
- Enter the sender’s email address.
- Select “Add”.
Norton AntiSpam
- Start Norton AntiSpam.
- Select “Status & Settings” tab.
- Select “Configure” button.
- Select “Allowed List” tab.
- Select “Add”.
- Enter the sender’s email address.
- Select “Ok”.
McAfee
- Click the “Allow/Deny” menu option in the Control Console.
- Enter the sender’s email address in the “Add Entrys” field in the “Allow List”.
- Click “Save”.
Entourage
- Open the email.
- Right click the sender’s email address.
- Select “Add to Address Book”.
- Verify the sender’s contact details.
- Click “Save”.
Mail.com
- Open the email.
- Click the “Plus” symbol on the sender’s email address.
- Add the first/last name of the sender.
- Click “Ok”.
GMX
- Open the email.
- Click the “Plus” symbol on the sender’s email address.
- Add the first/last name of the sender.
- Click “Ok”.