
Kodi launched its official remote control app, Kore, at the end of May 2015. Since the change from XBMC to Kodi and all of the internal code changes that went along with it, the original Android remote app needed a complete overhaul.
Now, with the release of Kore, our favorite remote control app is back in business. We’ll take you through a little history of the official Kodi remote app, and how to install Kore so you can control Kodi with your smartphone.
 So why would you want a remote app?

Seriously?
How many times have you lost your TV’s remote control?
My girlfriend has a habit of putting the remote in the most absurd places like the kitchen counter, dining room table, or even in the bedroom. I’d be willing to bet that there’s someone in your house who doesn’t put the remote back where it belongs.
If you can’t think who that person is, then it’s probably you. 🙂
On a more serious note, one of the big features of any media center is to make all your media as easy to access as possible.
Since we’ve usually got our phones with us at any moment, it makes sense to have a remote on your phone – at least as a backup. Kore isn’t going to have as many features as a dedicated air mouse, but it’s also not going to end up three rooms away from your TV, either.
BONUS: Check out our largest-ever guide on How to Set up Kodi 16: Jarvis the right way. Check it out here or using the image below!

Kore Features
So what are some of these features? We’ll let Team Kodi tell you about them from their official announcement blog post:
With Kore, you can:
- Control your media center with an easy-to-use remote
- Including several color themes
- See what’s currently playing, including relevant information (movies, TV shows, music, pictures, and add-ons)
- Change, sync, or download subtitles
- Switch to the desired audio streams
- All the usual playback and volume controls are at your disposal
- Toggle back and forth between windows or full-screen playback in Kodi
- Add, check, and manage the current playlist
- View what is in your media library with details about your movies, TV shows, music, and add-ons
- Direct link to relevant IMDb website for extensive information
- Library maintenance like cleaning and update
- Wake-on-LAN and other power control actions that the selected device supports
- Send YouTube videos to your currently selected media center
Essentially it gives you complete control over your media library without having to move, all from the phone in your pocket.
Since Kore is open-source, there are many more features in the works. This is an app that will just keep getting better in time.
What about Yatse?
Yatse is another Kodi remote control app, however, they are not authorized by Team Kodi.
That doesn’t mean that Yatse doesn’t work very well. Quite the opposite, actually. Yatse has a very devoted following and even has a few features that Kore does not.
However, Yatse is not an open-source software project. Since Kodi was founded on the belief that anyone should be able to modify and improve upon their source code – which is why XBMC and Kodi have always been open source. As such, Team Kodi will not team up with them.
How to setup Kore
Download the app
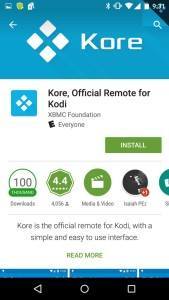 Download the app
Kore is available through the Google Play store, but oddly enough not the Amazon app store. If you’re interested in older Kore builds, the manual download page is here.
Please note, at the time of this article, there are two versions of Kore on the Google Play Store. One is made by Synced Synapse, the other is by the XBMC Foundation.
Synced Synapse created the app and was publishing it on its own before being officially integrated with Team Kodi. Their version of the app is no longer being updated but is still online for legacy support.
Be sure to install the version published by the XBMC Foundation.
Installation is as simple as any other Android app. Simply do a search to find the app and click Install.
There will be a few things to watch out for once we get to the configuring stage, but we’ll make sure you know how to handle them.
Find your Kodi installation
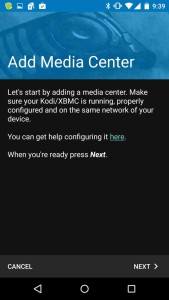 Find your Kodi installation
The first screen you’ll come to is the “Add Media Center” page.
Here Kore will automatically search your wireless network for your Kodi installation. So there are a couple of things to keep in mind first:
- Have your Kodi device turned on and running Kodi. This should go without saying. After all, you can’t expect it to find the device if it isn’t turned on, right?
- Make sure your phone and your Kodi device are on the same network. If you don’t connect your phone to your home wireless network, you’ll need to do so before you set up Kore.
Click Next to continue.
Searching…
 Searching…
Kore will then search your network for your Kodi installation, as I stated before.
This process should only take a few seconds, but you may run into a snag here. If Kore doesn’t immediately find your Kodi installation, don’t worry. It didn’t work right off the bat for me either.
Fortunately, it’s an easy fix, and I’ll take you through how to fix it in the “Kore setup problems” section below. It will involve going into your Kodi Settings screen and making three quick adjustments.
Nothing harder than clicking a couple of option boxes – I promise.
For now, I’ll assume that Kore found your Kodi installation and you get the following message:

If you have multiple Kodi installations on your network, you can set up Kore individually for each device. If you only have one, like the screenshot above, make sure the device is highlighted and click Next.
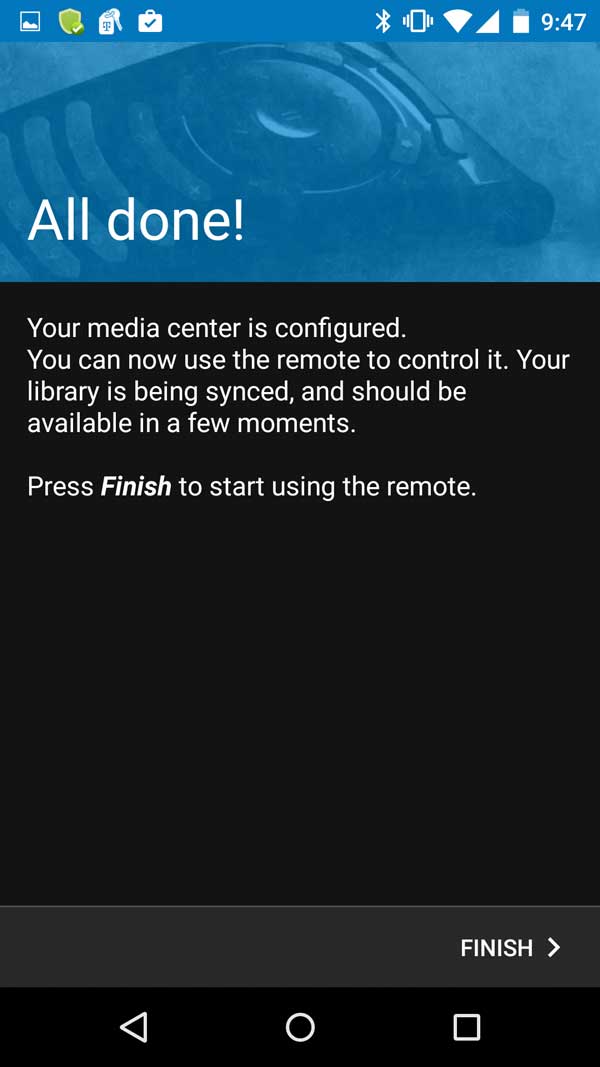
You’ll be taken to this screen and congratulations! You’re all set up.
I’ll go through a few of Kore’s features and menus below, but first, here’s what to do if the installation didn’t go as smoothly as this.
Kore setup problems
 Kore setup problems
If Kore couldn’t find your Kodi installation, you’ll be greeted with this polite, but slightly depressing message.
I’ve been around computers long enough to know that configuring a device on your network can be a royal pain in the butt. Think about how long it can take to install a printer on your network. That was what I was expecting when I got this message.
Thankfully, I couldn’t have been more wrong.
The link under the “If you need help configuring it” line will take you to the official Kore help file. However, that file doesn’t include any screenshots, so if you skim over the instructions (like I did), you could end up missing a key step.
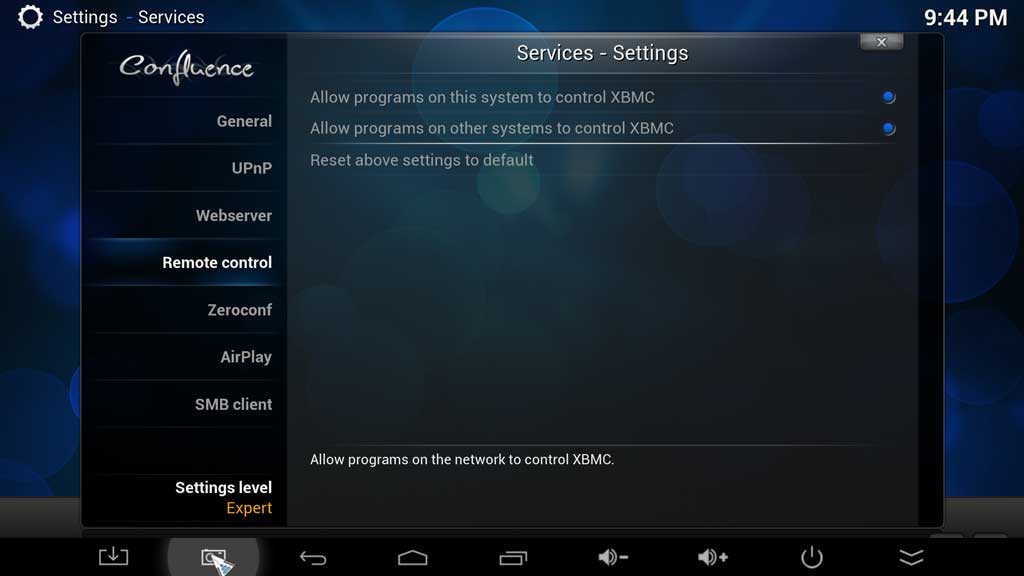
With that in mind, here are the two things you’ll need to configure inside your Kodi installation for Kore to see your Kodi device. Both will be found in the Settings screen under Services.
Under Remote Control:
- Enable “Allow programs on this system to control XBMC”
- Enable “Allow programs on other systems to control XBMC”
 Looking for more features? Check out our guide to finding the best air mouse
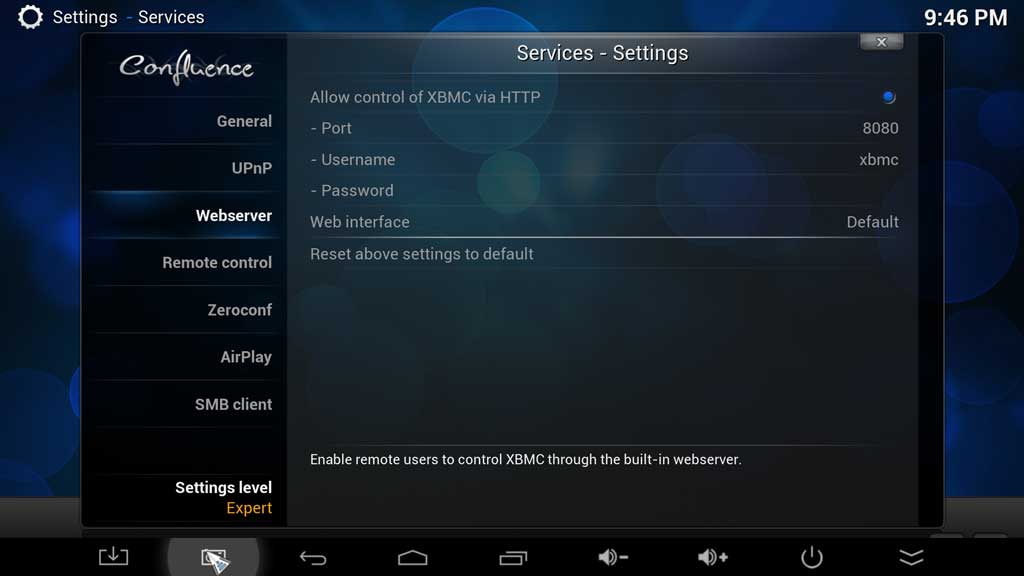
Under Webserver:
- Enable “Allow control of XBMC via HTTP”
- If you want to enable a username and password in this section, I would highly recommend it. If you do, you’ll need to enter those into Kore.
After those settings are enabled, go back into Kore and retry the Searching step. You should be able to rerun the Searching phase successfully.
Using Kore: The Official Kodi Remote
Kore is simple and intuitive to use, which makes sense if you’ve used Kodi at all.
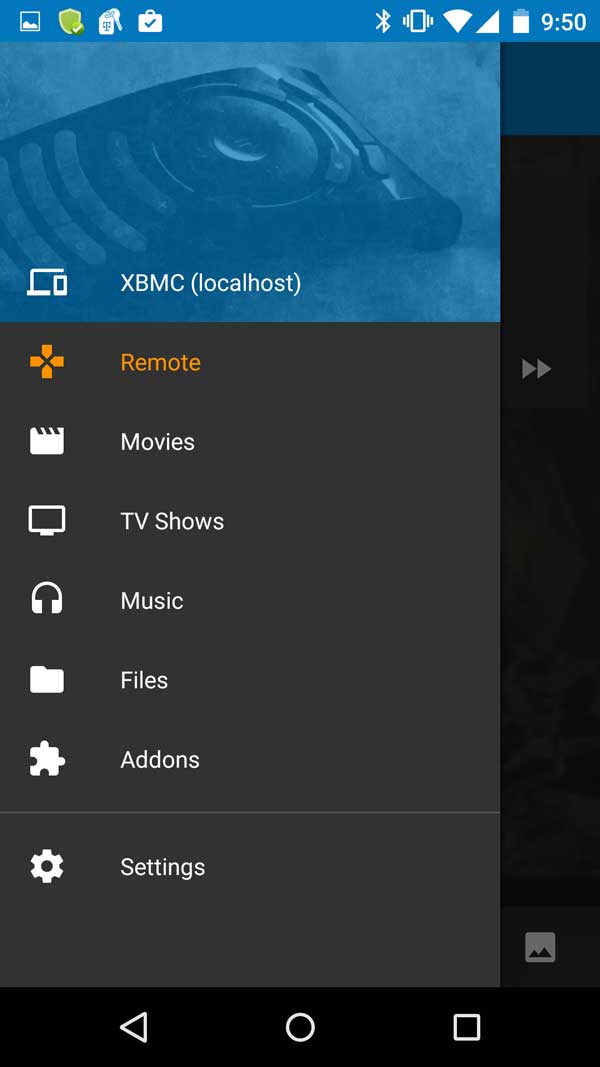
The Kodi menu settings have all been integrated into a left-side toolbar on the Kore remote app. As with Kodi, you can enter this menu while you’re watching a movie and it won’t interrupt playback.
The look and feel of Kore is somewhere between the standard Android “Material Design” and the more graphic, “skinned” feel that Kodi users have come to know and love.
To give you an idea of what I mean by that, the menus are very simple, as you can see in the image at the left here. There’s not a whole lot of detail to distract you from what you really want, which is to watch your movie, right?

During playback, Kore will load some of the file’s thumbnail images as a background for the Kore remote. You can see in this image it used a small thumbnail for Sintel as the main image and also used a larger, more muted version of the image as a background as well.
If there aren’t any images, then it will default to the basic remote image as shown at the top of this article instead.
Functionality
The remote is basic, which matches Kodi’s “10-foot user interface” philosophy.
Everything you need can be controlled using the “D-pad” in the center of the screen. There are also quick-launch buttons on the bottom row to take you to the Kodi Home screen, Movies tab, TV Shows tab, Music tab, and Pictures tab. Playback buttons are conveniently at the top of the screen, easy to reach with your thumb.
The Verdict
Kore is a convenient and versatile Kodi remote control app that lets you easily navigate around the media center. The one drawback I can see is that it only works within Kodi. If you’ve lost your remote and your device doesn’t boot directly into Kodi, you’ll still need to find a way to launch Kodi before you can use Kore. This isn’t too big of an issue since there are Android remote apps already available, but it’s worth mentioning.
What do you think of Kore? Do you like it? Hate it? Prefer Yatse?
Let us know in the comments below!


I have misplaced my kodi remote, therefore i have NO WAY to go into settings to connect to my wifi.. What do i do now..
It works except the on/off function. Definetly prefer it over the original controller. hopefully i can figure this on/off issue.
Reading your website feels like attending a valuable masterclass.
Thanks for that. Its inspiring me to keep going! )