

Have you ever wondered how you can make your Kodi look like Netflix?
Every now and then I come across something that’s just too good not to share.
This article is based on a video from KordKutters which definitely falls into that category.
If you don’t already follow KordKutters, I’ll give you a little background on who they are. KordKutters is the somewhat official side project for Nate and Ned from Team Kodi. The video series is still very Kodi-focused, but they veer off course slightly and discuss other things as well.
In all seriousness, if you’re not watching their videos as well as reading this site, then you need to go subscribe to them too.
Just, finish reading this article first, OK? 🙂
Anyway, when I came across this video I knew instantly that it would be extremely helpful to a ton of people. So that’s why I have to do my part to get it out there for everyone to see.
If you’re like most people, then you probably got into TV boxes and streaming media players as a way to watch Netflix, Hulu, or even your own videos on your TV without a lot of hassle. Kodi gives you the control to do that and so much more.
But, it ramps up the complexity level significantly. A lot of people just want that Netflix interface when they use Kodi, and that’s why Nate made this video.
So, the story in this article belongs to Nate and Team Kodi. I’ve expanded on some things where I thought it was necessary and added the screenshots you’ll see below. But the content is all his. It’s a great video, and you should definitely watch it.
Why make Kodi look like Netflix?
One of the big benefits of Kodi is that it’s an almost infinitely customizable media center. You can change different aspects of it, either by skins, add-ons, or by modifying the code itself.
But what do you do if you have other people in your life – spouses, children, or parents, for example – that don’t want to put the time or effort into tweaking Kodi to their own tastes? What if they are used to a Netflix or Hulu-type interface, and just want to have Kodi look more familiar?
There are a few different things that we can do to make Kodi look like Netflix. I’ll separate them into four major areas. Three of these are add-ons that you can install from the official Kodi add-on repository. The last section will cover a minor modification to the keyboard mapping.
Don’t worry, I’ll walk you through everything.
I should note that everything I took screenshots of below was done within Kodi 15.2 Isengard. Since 16.0 Jarvis hasn’t been released at the time of this writing, 15.2 is the most stable version of Kodi available. If anything changes in 16.0, I’ll update this article accordingly.
Info first, play later
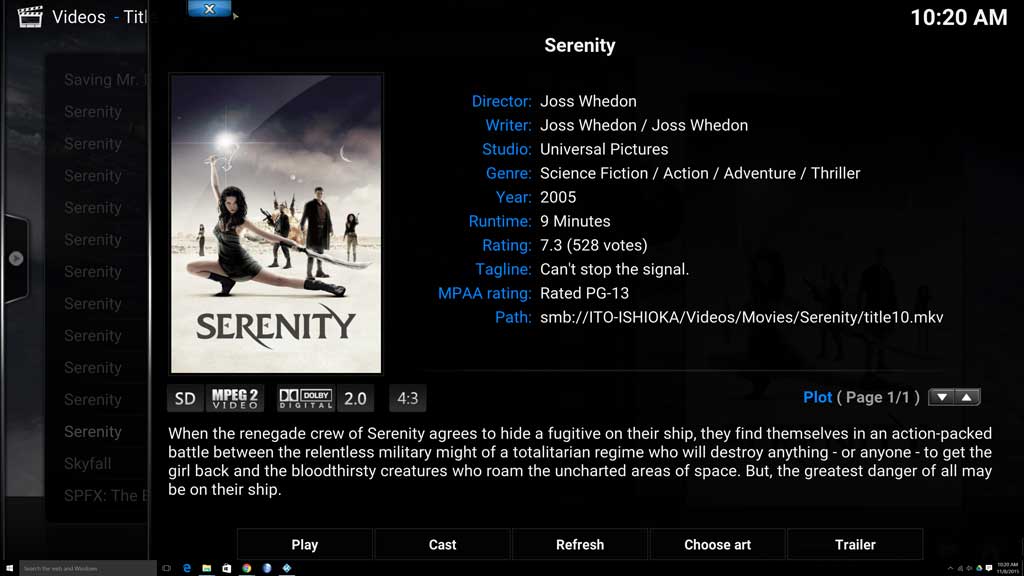
The first thing you’ll notice about Netflix is that it doesn’t jump right into a video. Instead, it shows summary information like the main actors, directors, writers, and MPAA ratings. All the things that I personally skip right past, but I’m sure will matter to some movie buff, somewhere. Note: If you haven’t already set up your media library, check out my tutorial on how to rip your DVD and Blu-ray movies to your hard drive using MakeMKV.
Let’s enable that view so that we get the same layout in Kodi.
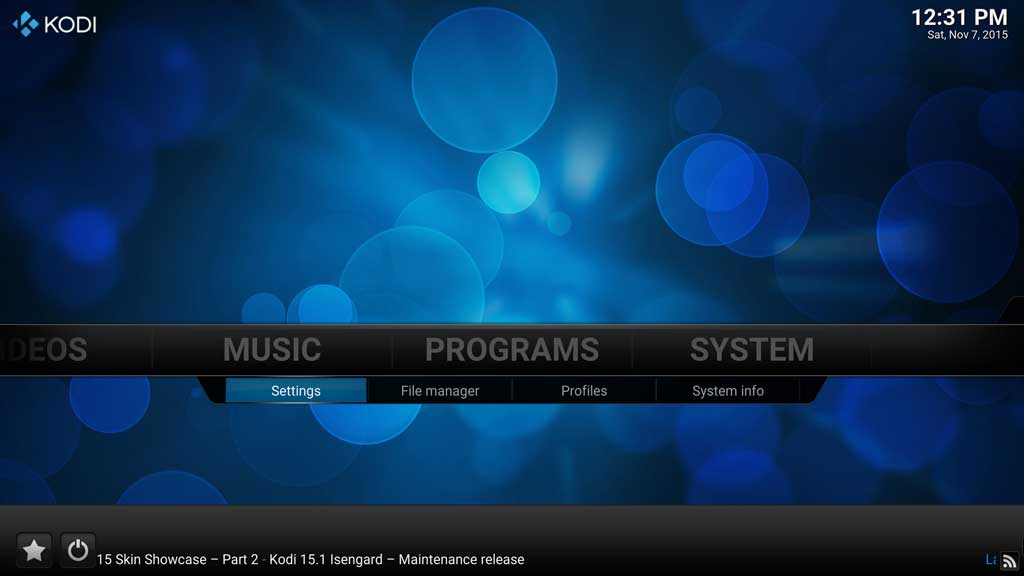
First, we’re going to head over to the System menu.
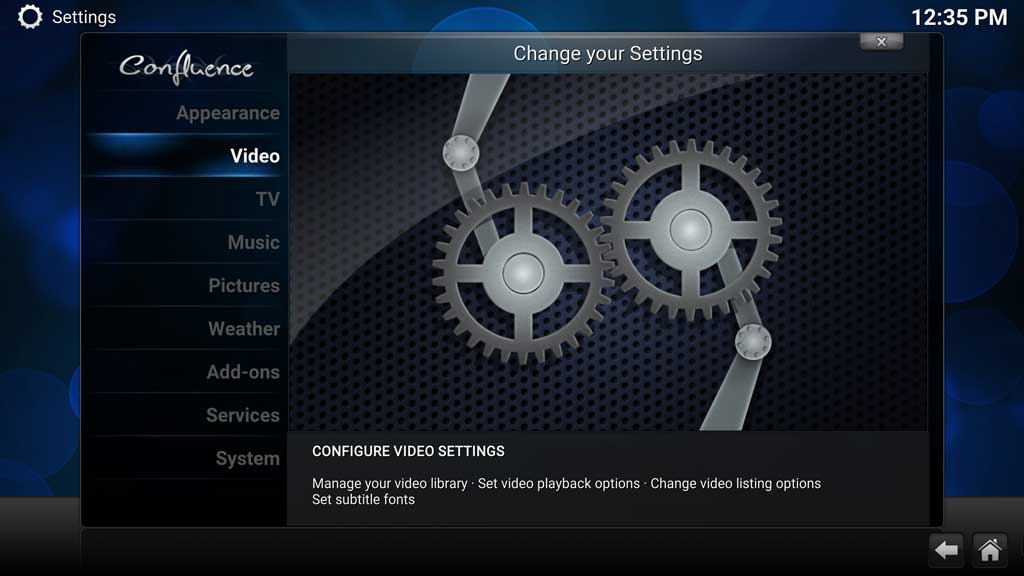
…then to the Videos settings sub-menu…
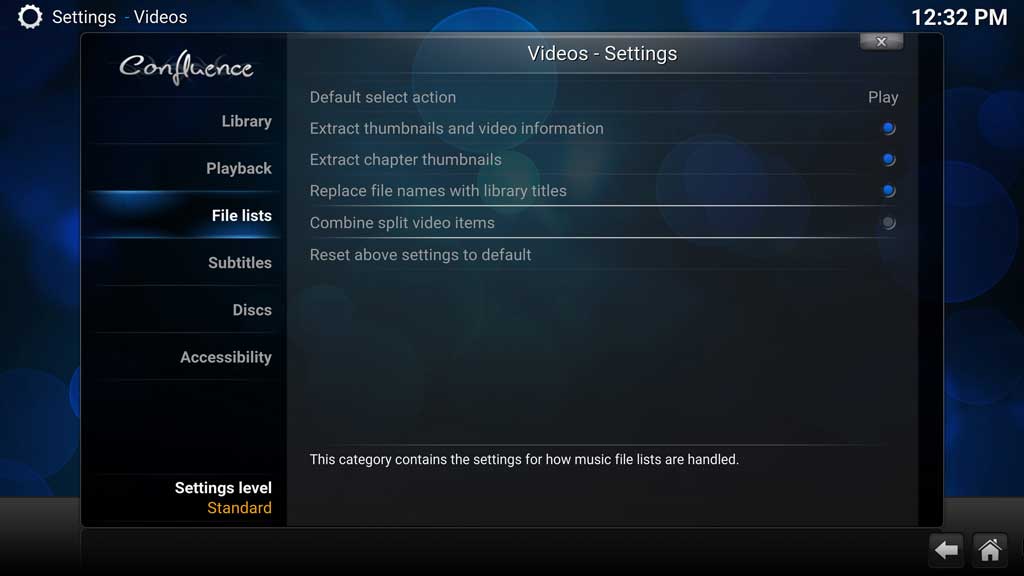
Finally, click on File Lists.
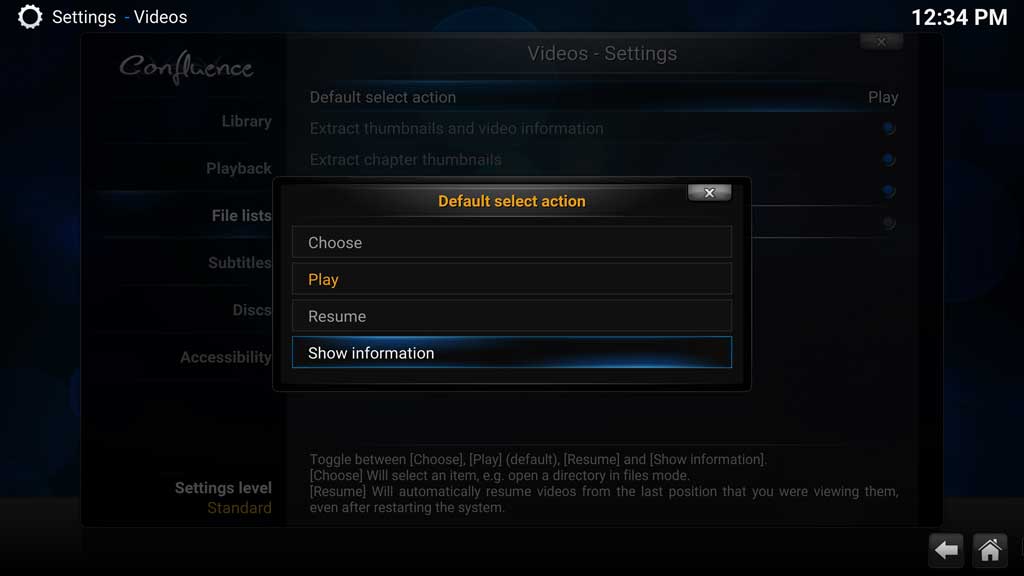
The default action for Kodi is to play the video immediately, but that’s not what we want if we want to make Kodi look like Netflix. We want to change the Default Select Action to Show Information as you see below.
The end result is that you’ll get a summary screen for each file in your library that looks something like the image below. One thing to note: you may need to manually update the movie titles for files that the scraper couldn’t identify.
To manually update or change a title, click on the Refresh option, which is located at the bottom center of the information screen. There you can input the video title manually, which will cause Kodi to download the new title’s information.
How to install a Kodi Add-on?
First, here’s a quick explanation of how to search for and install an add-on. If you already know how to install and enable an add-on, then you can skip this section and pick it up at the next heading.
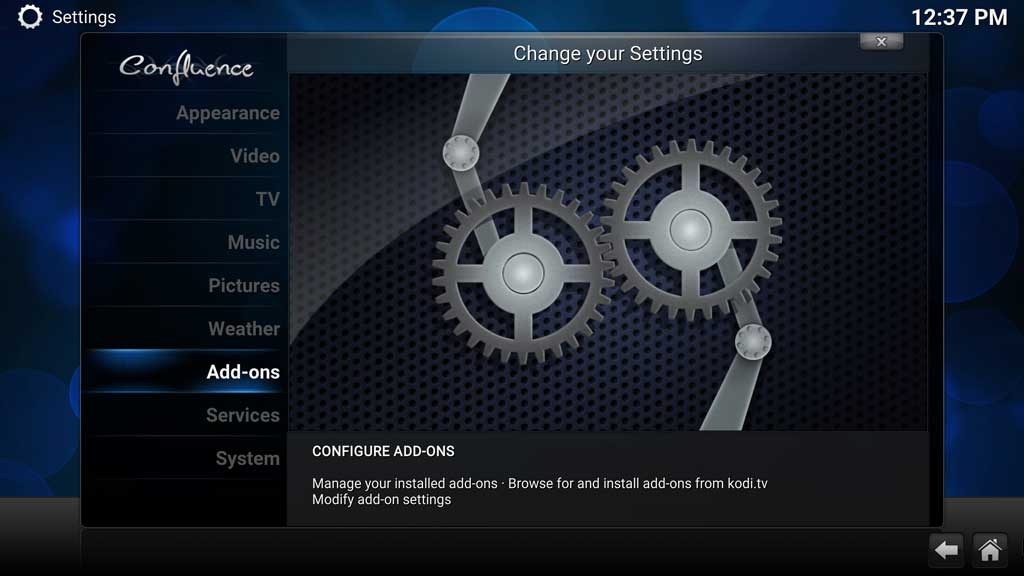
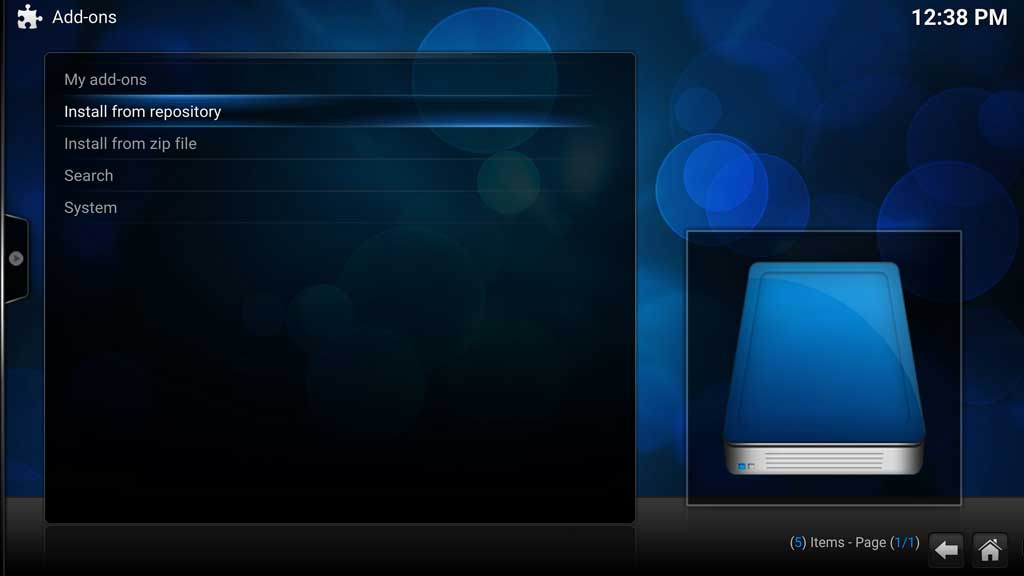
To install an add-on, go back to the Settings screen and scroll down to the Add-Ons sub-menu and click Install from the repository. You may have several repositories available, but the ones we’re looking for will be in the official Kodi Add-on repository.
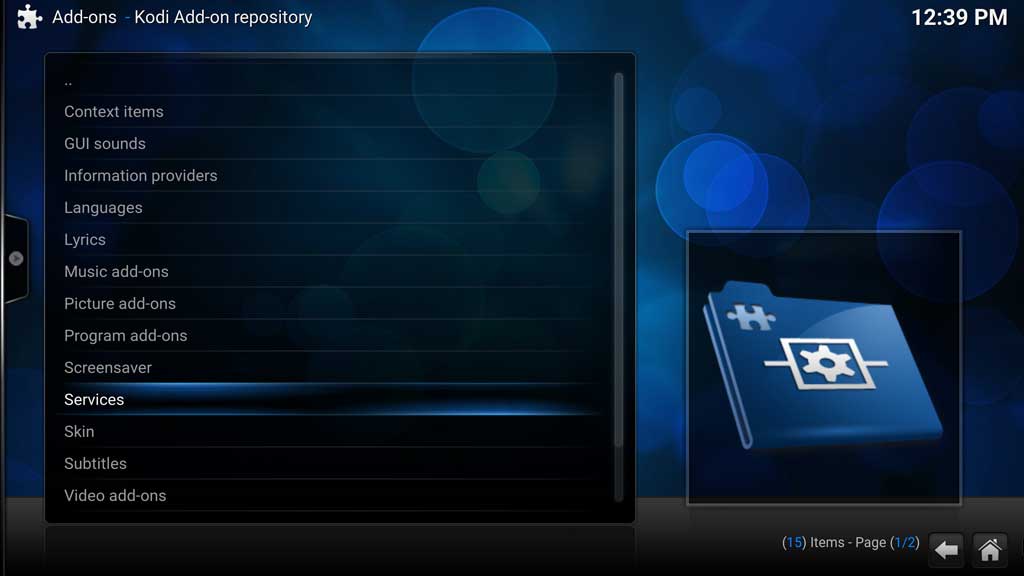
The official Kodi Add-on repository is broken down by the add-on’s general purpose. You’ll see sections for different Languages, Skins, Services, Screensavers, and many other types. There are many other unofficial repositories out there, but these are the ones that are officially approved by Team Kodi.
The three add-ons that we’ll be installing will all be in the Services section.
Next up Service Notification
My favorite feature of Netflix is that it will tell you what video is coming up next. This feature was so popular and so intuitive that many other websites adopted it for their own streaming content. You can find similar notifications on all of the ABC and CW streaming sites, for example.
As the episode you’re watching is finishing, the Nextup Service Notification adds a small pop-up window in the lower right-hand corner of the screen that shows the next title in the series.

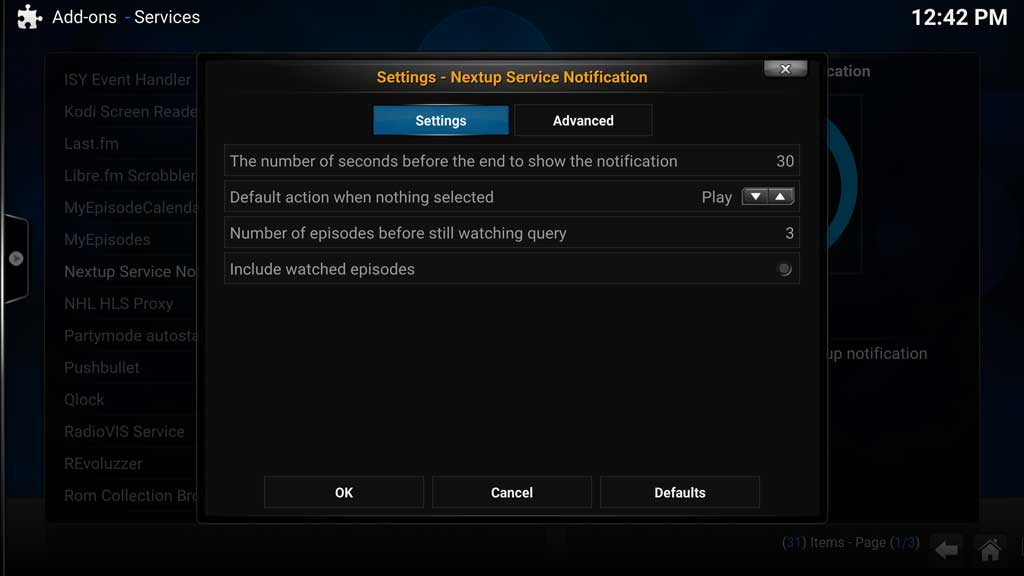
The Nextup service has quite a few settings that you can tweak. You can change how long before the end of the current video to show the preview window for the next video. You can also change the default action – to play the video or not. You can also have it include or hide watched videos, and ask you after a set number of episodes if you’re still there and haven’t fallen asleep.

To install it, scroll down in the list of Services Add-ons until you find the Nextup Service Notification and click on it.
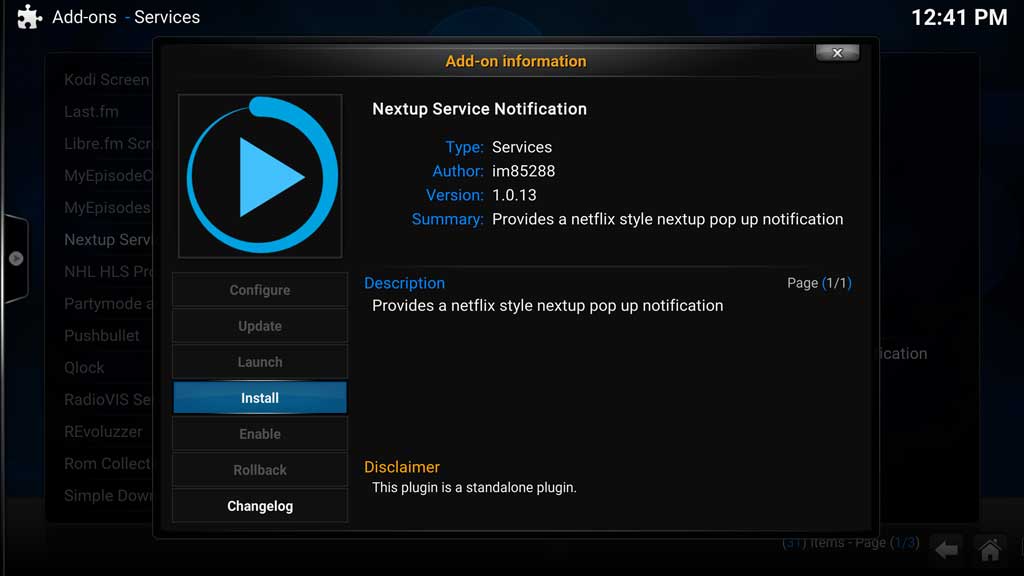
Select Install from the on-screen menu. This should only take a few seconds to download and install. Once that’s finished, you can click the Configure button to change some of the settings I mentioned earlier.
XBMC Check Previous Episode
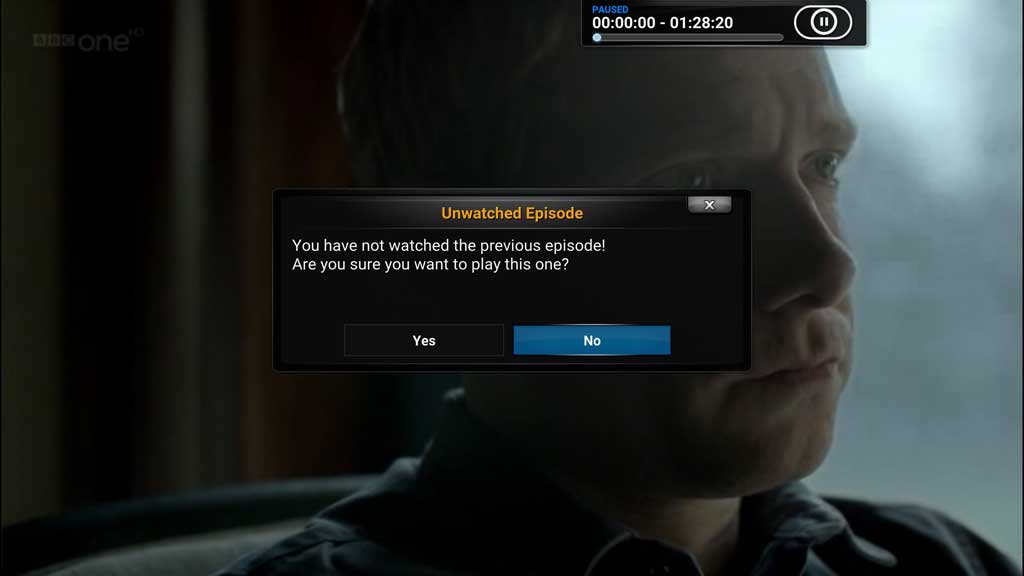
This is a useful add-on that will look at the previous episode in the series you’re watching and warn you if you haven’t watched it. For example, if you’ve watched episodes 1-7 of a TV show and then attempt to watch Episode 9, it’ll tell you that you’ve skipped episode 8.
To install it, scroll down in the list of Services Add-ons until you find the XBMC Check Previous Episode and click on it.
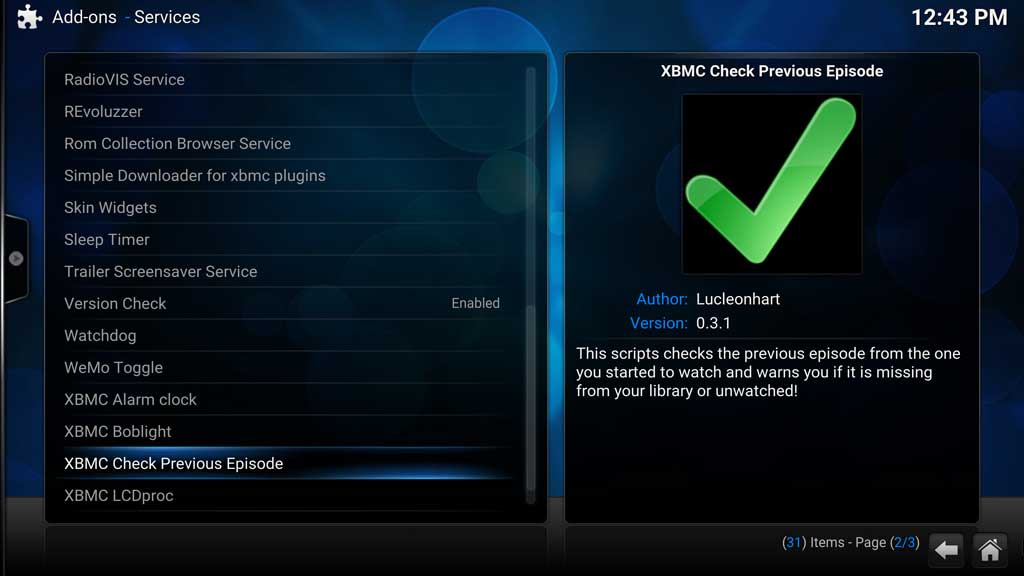
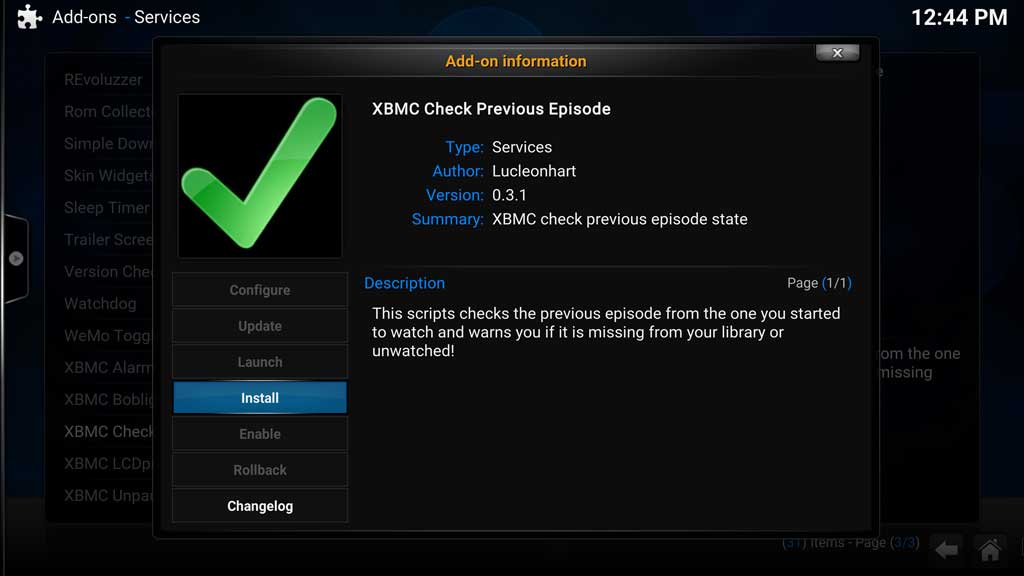
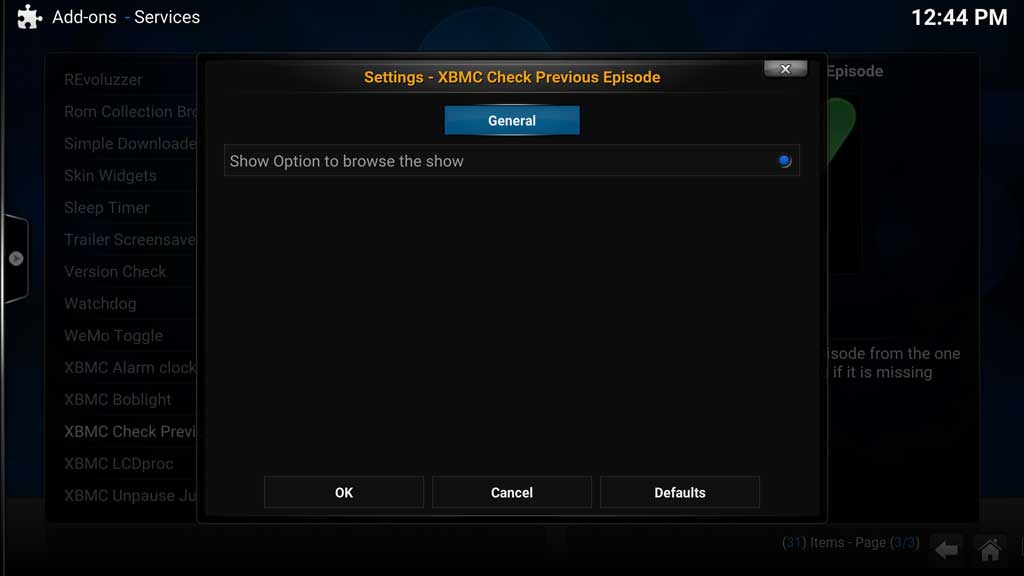
Select Install from the on-screen menu. This should only take a few seconds to download and install. Once that’s finished, click the Configure button. There’s only one option to configure for this add-on. It will give you an option after the warning above whether you want to browse your library for the available episodes.
XBMC Unpause Jumpback
This add-on will “jump back” a few seconds after pausing your video for an extended period of time. While this isn’t specifically part of making Kodi look like Netflix, it is a really useful add-on because it can help you get back in the flow of a show that’s been paused.
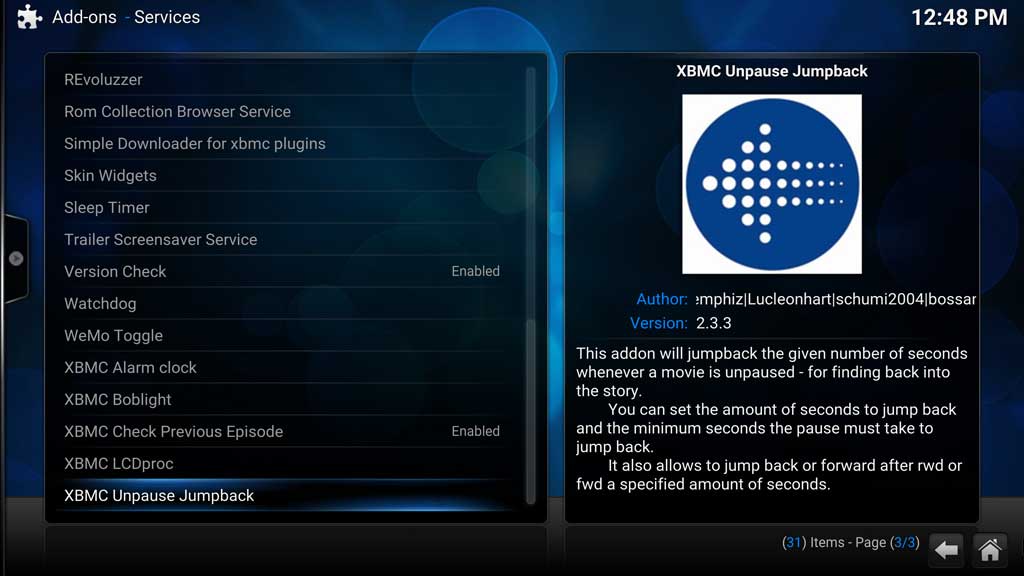
Install this add-on like the others by selecting it from the list and clicking Install.

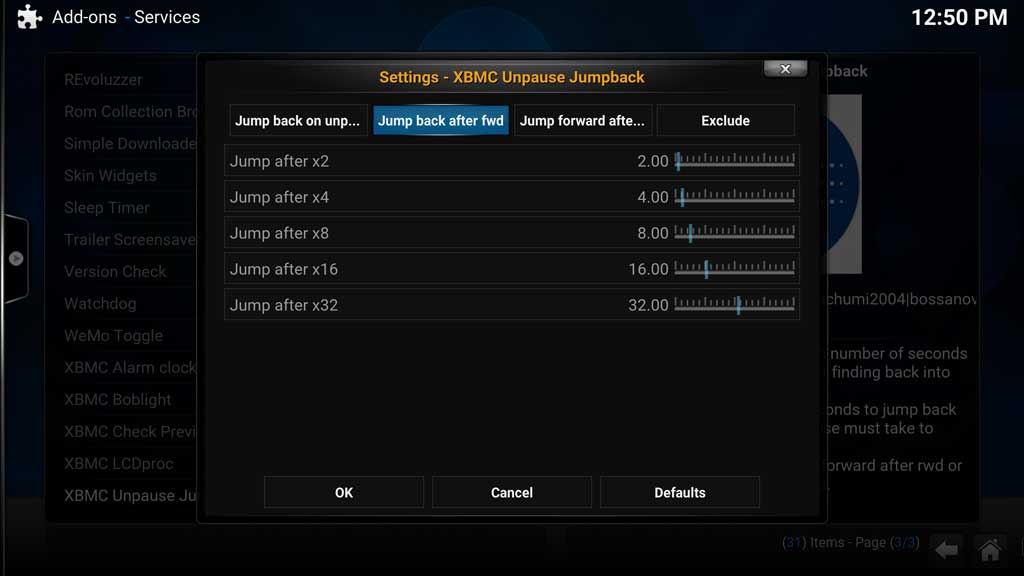
This add-on includes a few more useful settings, as well. You can set the “jump-back” time after fast-forwarding and rewind skips, as well as set exclusions for file types that XBMC Unpause Jumpback will ignore.
Change the Kodi Keymap
Up until now, everything could be taken care of from within the Kodi interface. But here’s where we need to make a few changes outside of Kodi itself. There is an add-on in the official Kodi add-on repository called Keymap Editor, but since Nate’s video showed the manual process, that’s what I’m going to be detailing here.
What we’ll be doing is modifying the keyboard.xml file, which controls all of the keyboard and remote control settings for Kodi. This is an XML file, which is similar in basic structure to HTML if you’ve looked at the code behind a web page at any time. They’re not exactly the same but don’t worry. We won’t be making any drastic changes.
To modify this file, you can use any text editor, like Notepad, which comes with Windows. Personally, I love Notepad++, so that’s what I’ll be using. If you want to download it, it is a free text editor that has amazing capabilities. If you want to download it, you can do that from their website here.
One big benefit to Notepad++ is that it includes line numbers, which will be helpful, as you’ll see next. The line numbers may change as the keyboard.xml file is modified by the Team Kodi developers, but they should give you a good area to start looking.
On a Windows system, the Keyboard.xml file is located at c:\Program Files (x86)\Kodi\system\keymaps
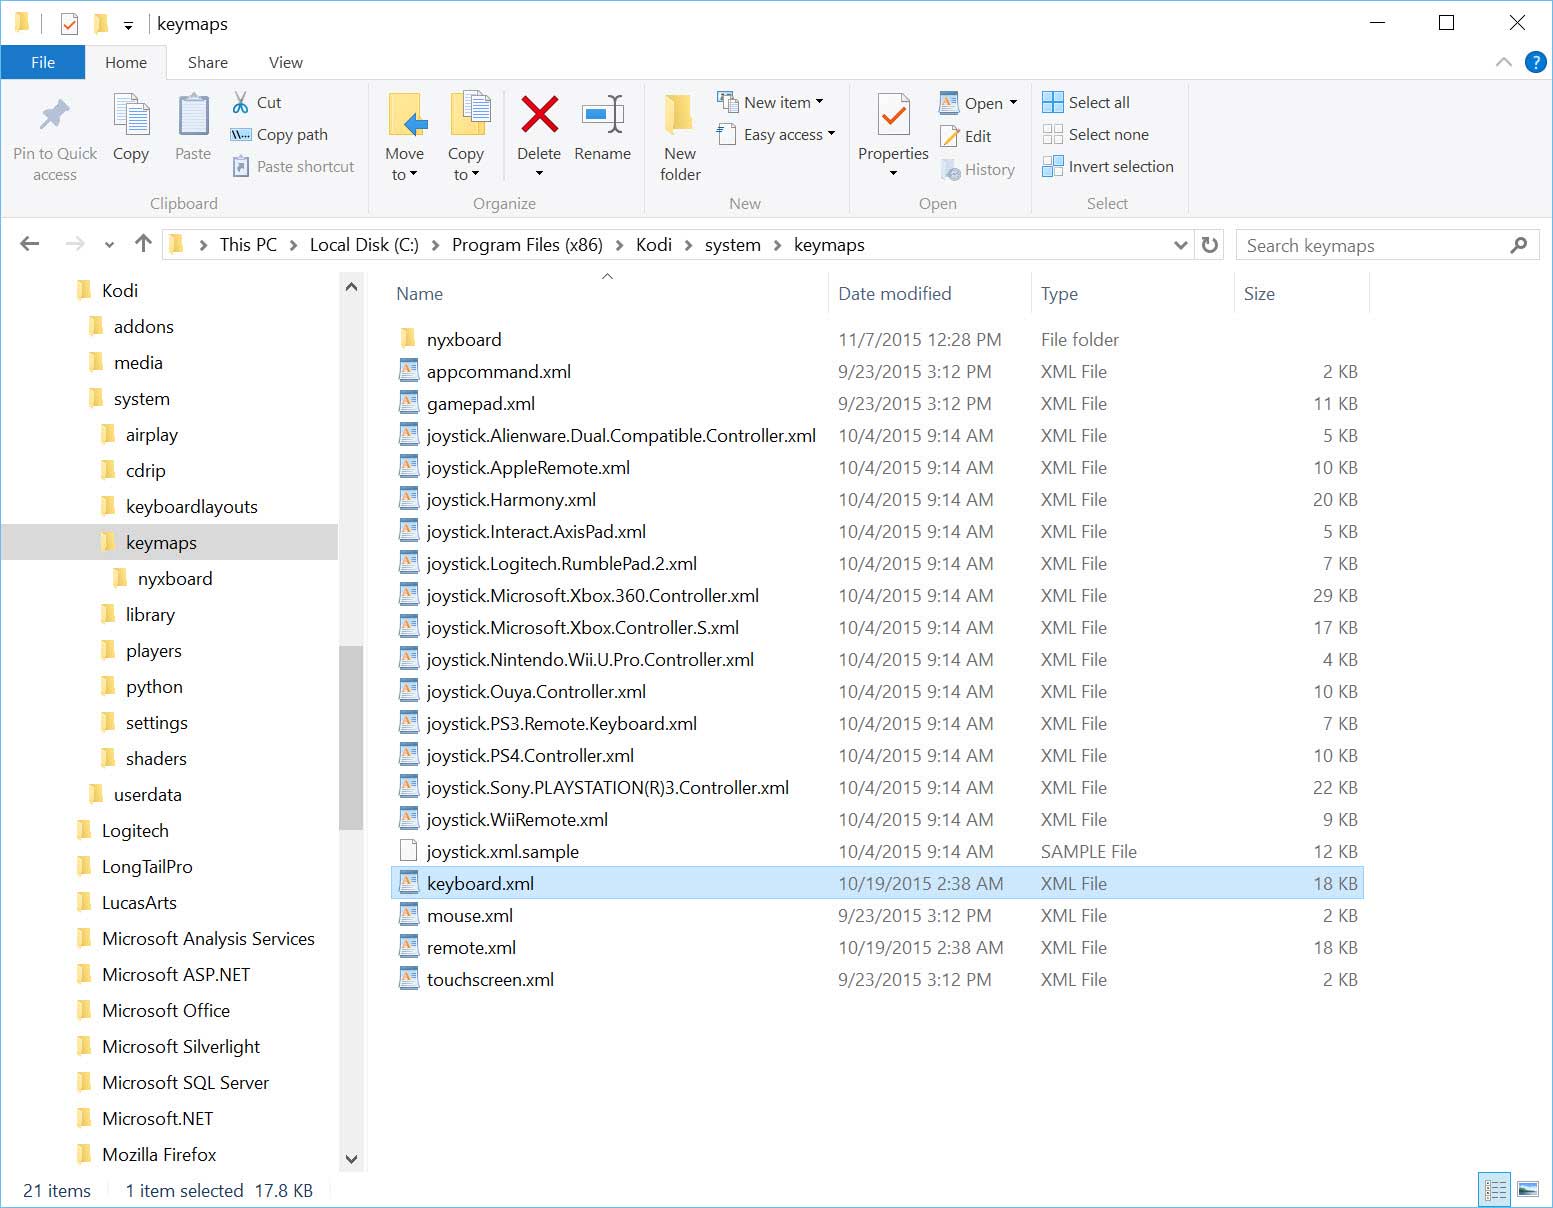
First, make a copy of the file. We won’t be editing the original, but we will instead be adding this copy to the userdata\keymaps folder. You can put this file anywhere you like while you’re working on it. Just be sure to remember where it is for later. 🙂
Open the file in Notepad++ (or whichever text editor you prefer). I would NOT recommend editing this in Word or a full-featured word processor. First, it’s overkill. Second, Word will default to saving the file in a .doc or .docx format, and that isn’t what we want.
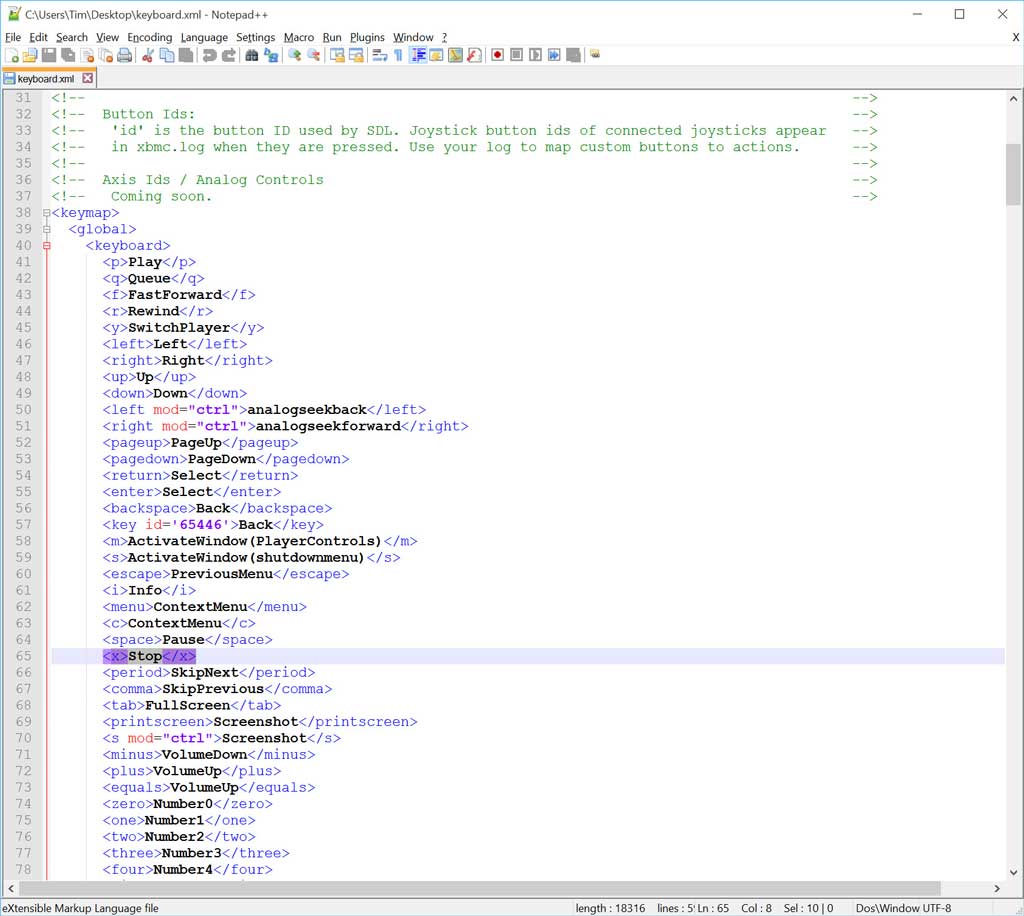
We’ll be looking first at the Global Keyboard area, specifically for the ‘X’ key. This should be at around line 65. Copy that entire line, including the opening and closing tags. I’ve highlighted it in the image above. Copy <X>Stop</X>
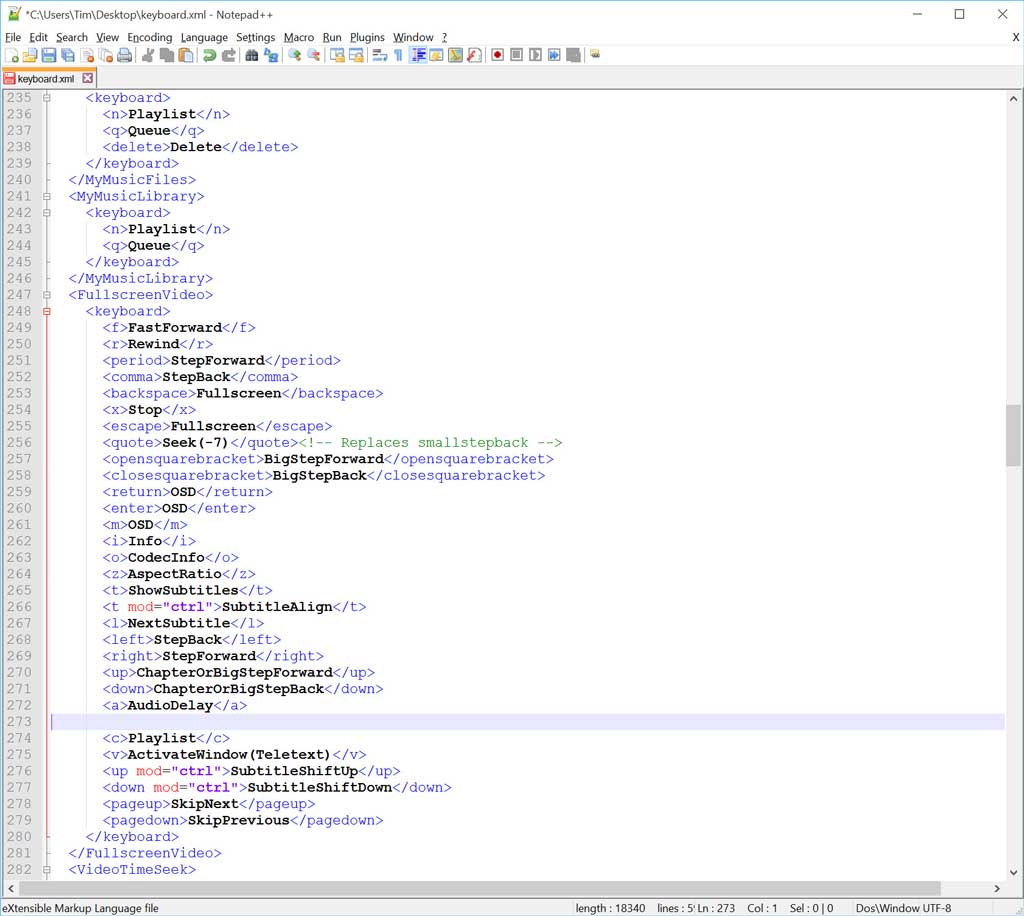
Next, we’re going to scroll down to Full Screen Video. This should be around line 247. Insert a line underneath the “Backspace” tag. This should be around line 254.
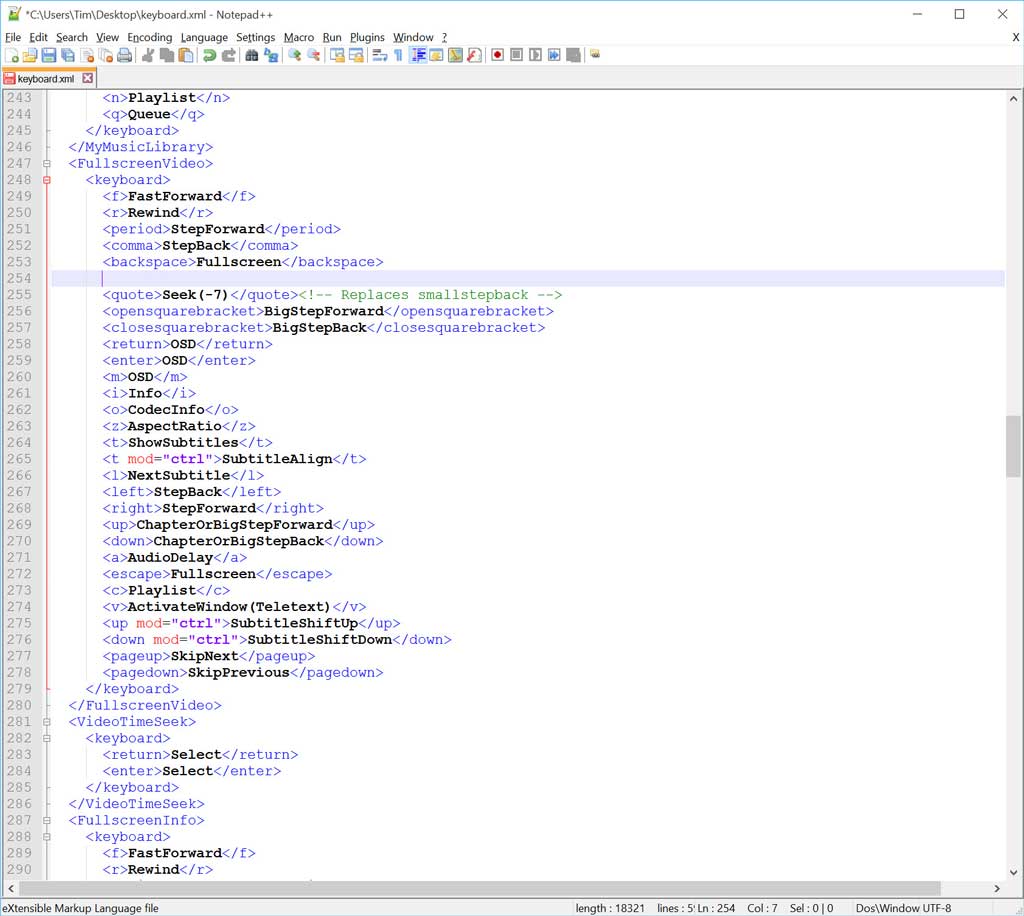
Paste the “X” line that we copied from the Global Keyboard into that new empty line.
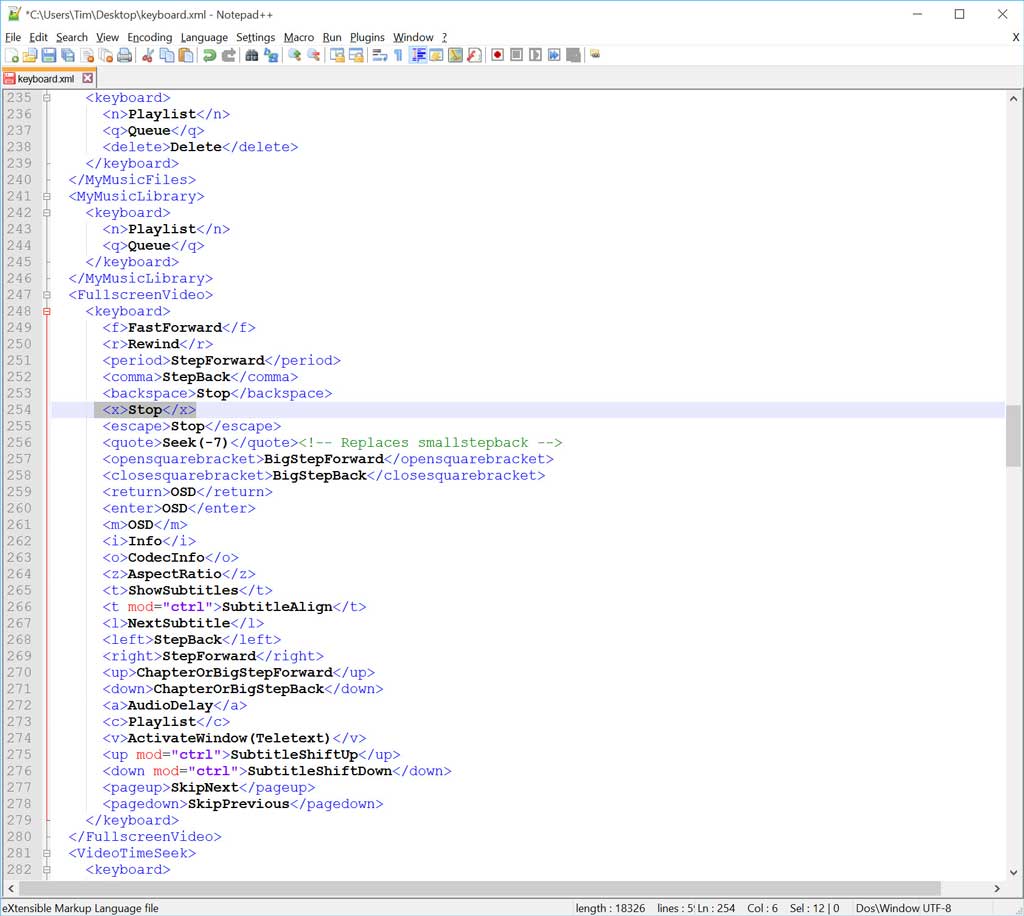
Insert another new line right below the “X” line that you copied.

Cut the “Escape” line and paste it into that new empty line. The “Escape” line should be around line 273.
Delete the empty line where “Escape” used to be. Now we will have Backspace, X, and Escape on consecutive lines. Since we’ll be changing all three, this will make our changes easier to keep track of.
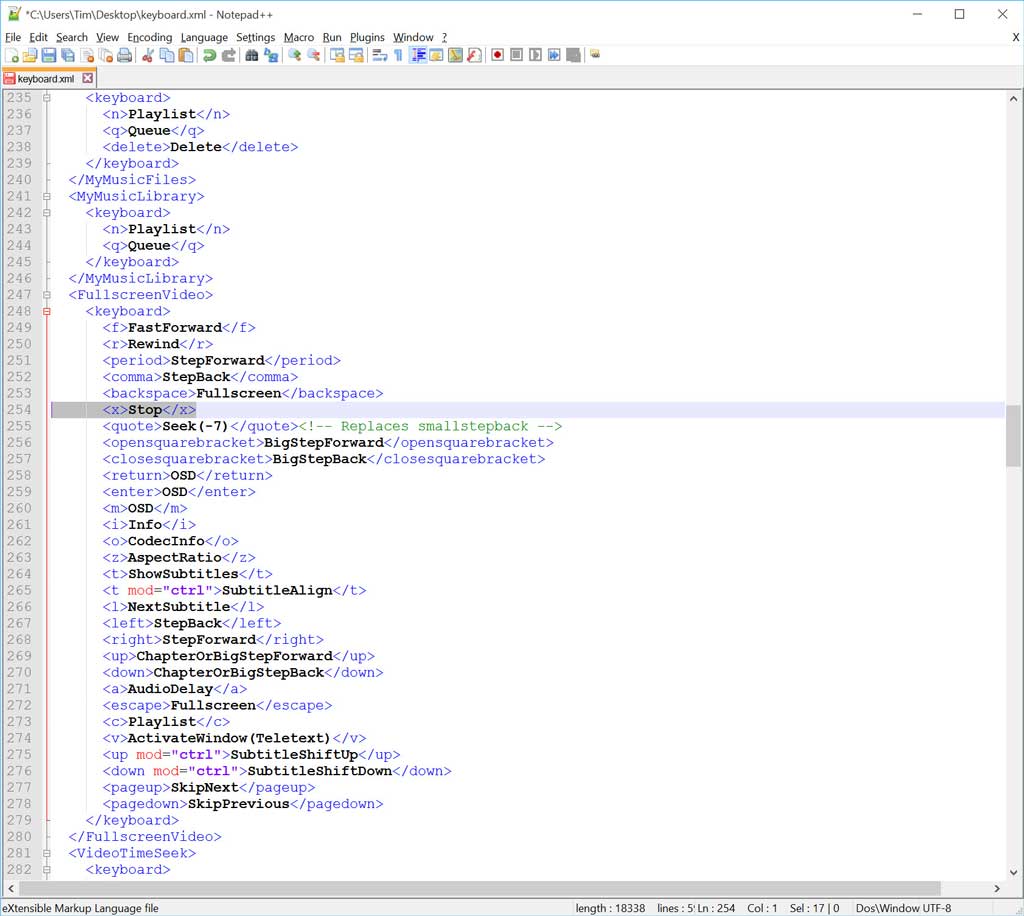
Any changes we make will be the word in between the opening and closing tags. For example, right now Backspace is set to Fullscreen. This is the word in between the opening <backspace> tag and the closing </backspace> tag.
For Backspace: Change Fullscreen to Stop.
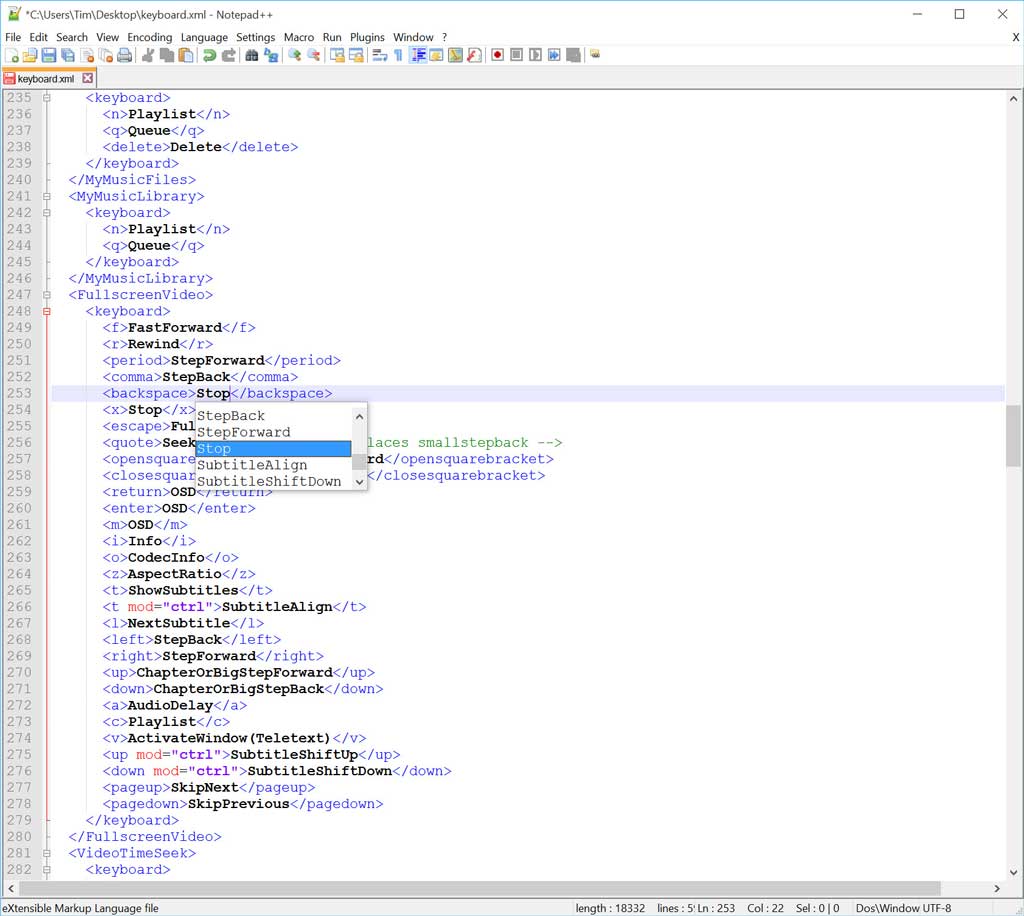
For Escape: Change Fullscreen to Stop.
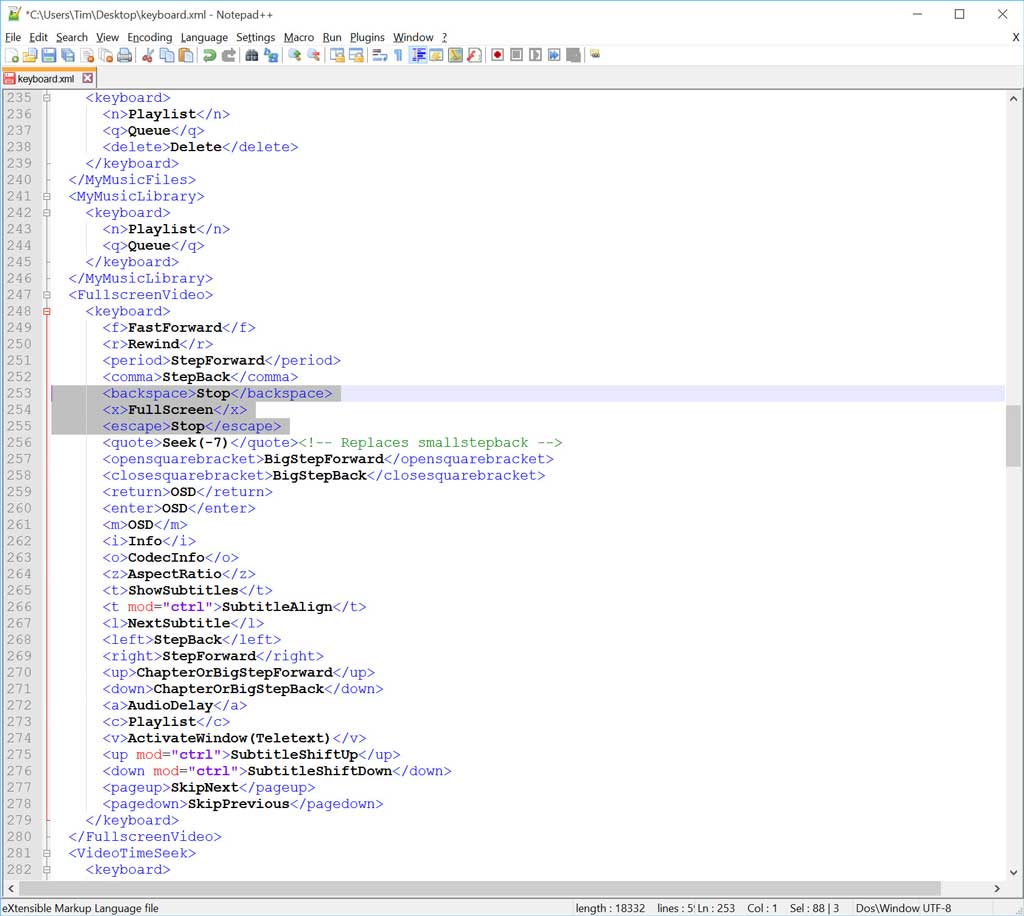
For X: Change Stop to Fullscreen.
Save your file.
In Windows, go to the Start Menu and click Run. Type in %appdata% and hit Enter
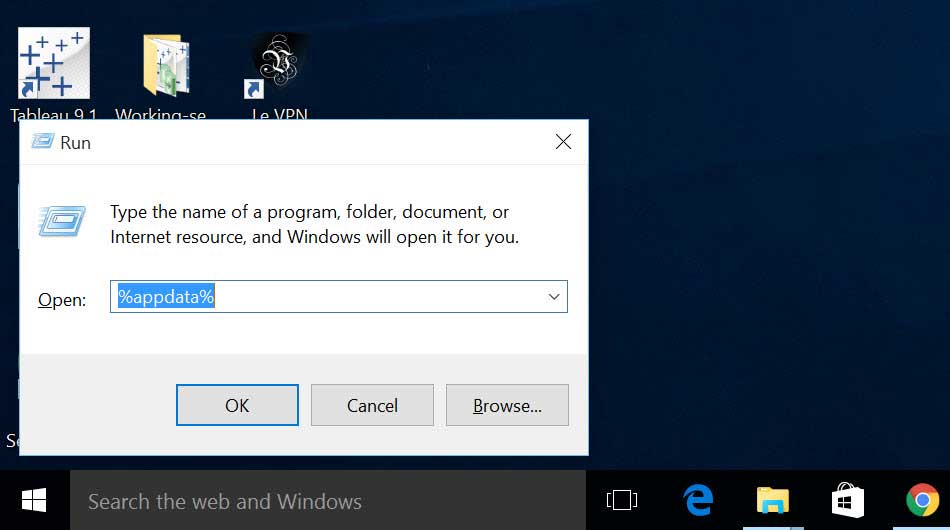
This will quickly navigate to the application data folder, where we’ll find all of the user-specific settings. Be careful what you modify in this folder since it can have very serious consequences for your programs, not just Kodi.
Navigate to our Kodi folder, then click down on user data and keymaps.
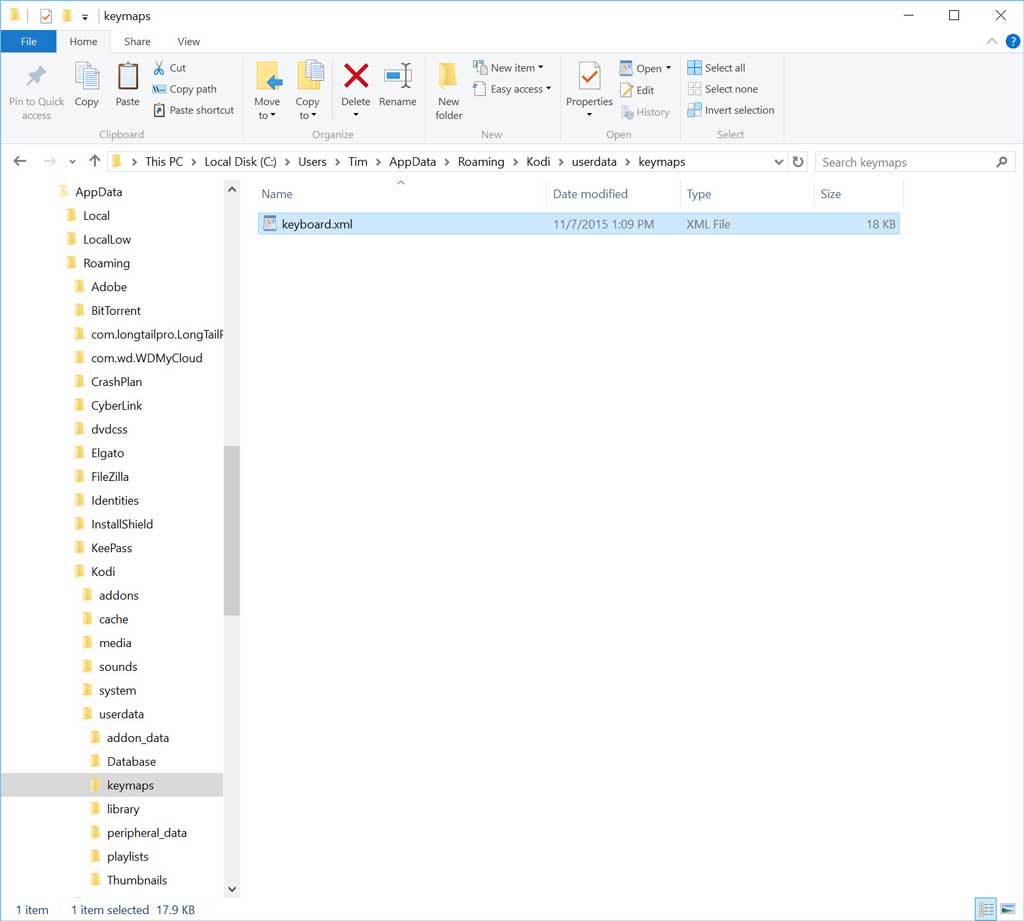
Copy the keyboard.xml file that you saved into this folder.
That will keep the original Kodi keyboard.xml file in the system folder, but enable the changes that we’ve made for your profile as well. If you don’t like the changes, that way you can simply remove the keyboard.xml file from the AppData folder and you’re back to the default configuration.
Conclusion
And that’s it. That’s everything that you need to make Kodi look like Netflix, at least a little bit.
Again, thank you to Nate from KordKutters for the great video tutorial. As I said at the top of this article, everything I’ve written is taken from that video, so he deserves all of the credit – except, of course, for my awesome screenshot capabilities.
But seriously, check out KordKutters on YouTube and Nate on the Team Kodi forums. If you’ve liked his video give him a thumbs-up and subscribe.
I’ve gotten some great feedback from the Kodi community and that’s the reason why I keep writing tutorials like this. So, if you liked this article, please share it to get the word out about both this site and what I do here.


Extraordinary is a beautifully developed device that will certainly aid you find the most effective items in any type of category promptly and conveniently.
oh this is great. This is a great way to make Kodi look like Netflix. The information is highly applicable and very useful. I appreciate this information.
Thank you, for your feed back!! )) Good Luck in your streaming expirience!!